
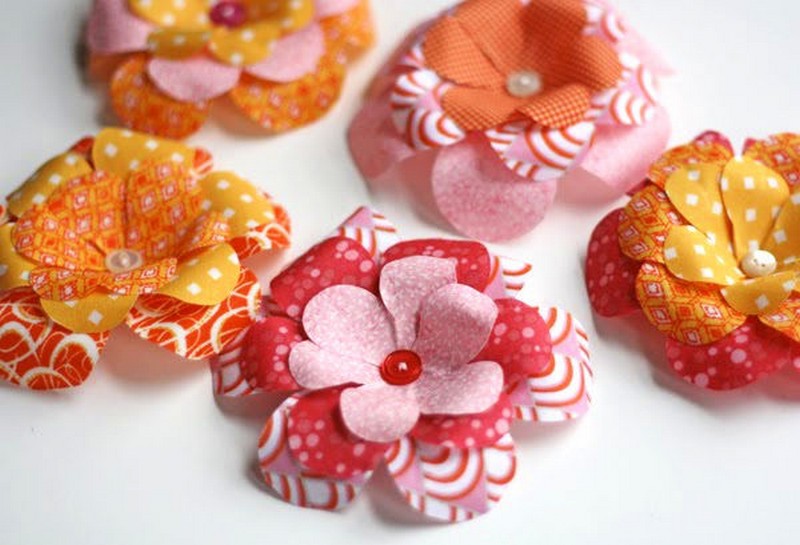
21 DIY Fabric Rosettes Ideas Make In 5 Minutes
Are looking for something new Crafts other than recycling bottles and mason jars? If yes then here are some quirky plans to funk up your craft game. Doing these 21 DIY Fabric Rosettes Ideas Make In 5 Minutes would be your next craft craze for being so cute, colorful, and fun to make at home.
There are jillions of ways to make this cute little fabric Rosset and also a variety of ways to use them around too. They can beautify any of your possessions in just minutes. Just make a few fabric rosettes and add them to anything to charm up its look and beauty. The picture frames, bags, Sweaters, and shirts are going to look so jazzed up and funky with these DIY fabric Rosset on them. Also, these adorable tiny Fabric Flowers Make the best girly ornaments in the shape of headbands, clips, belts, and bracelets. From the mini fabric roll-on Rosset to the giant floral beauties in your vases, you are going to learn to make them all with the help of this amazing DIY fabric Rosset round-up.
Also, these ideas are a perfect way to bust your stash and kill your free time in the most interesting and skillful way. The kids would also love making these pretty fabric russets with you and having some weekend fun. The assets can be beautified more with jewels, pearls, stones, and ribbons and thus opening up more room to play with creativity. Follow the fun round with details and instructions here!
Popular Posts:
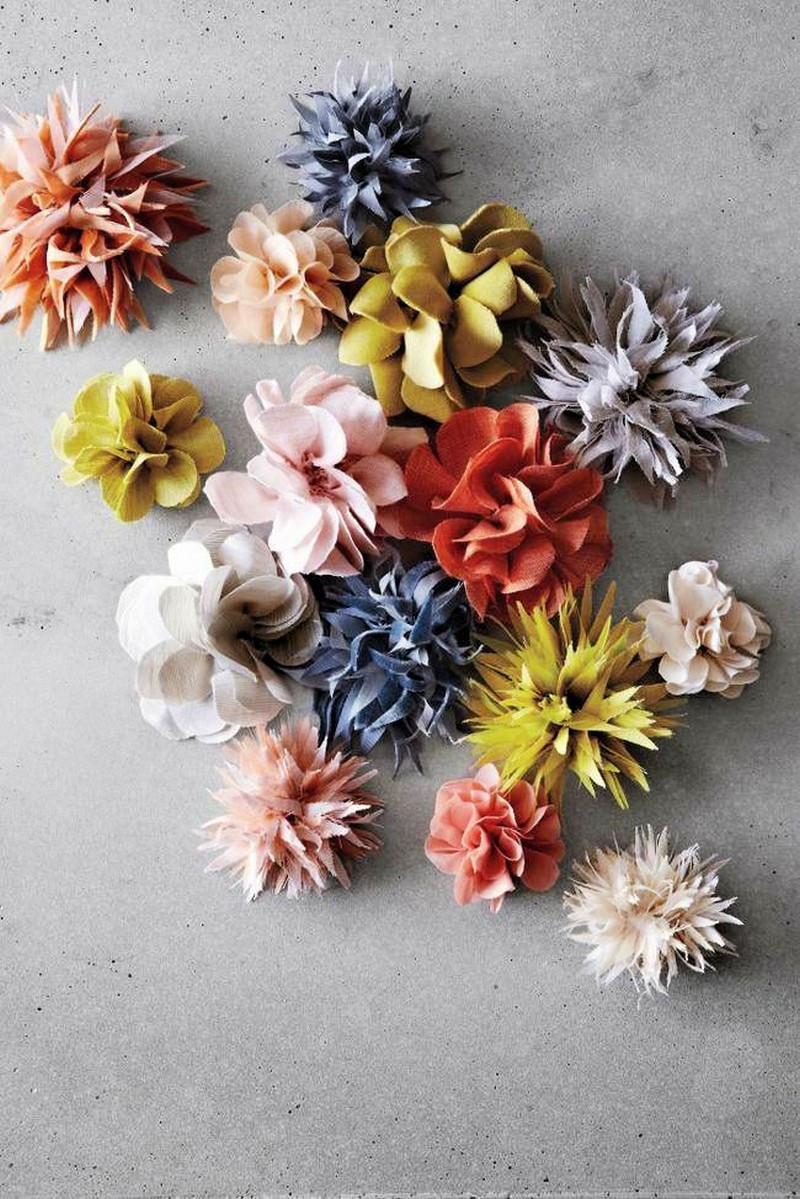
1. DIY Fancy Flower
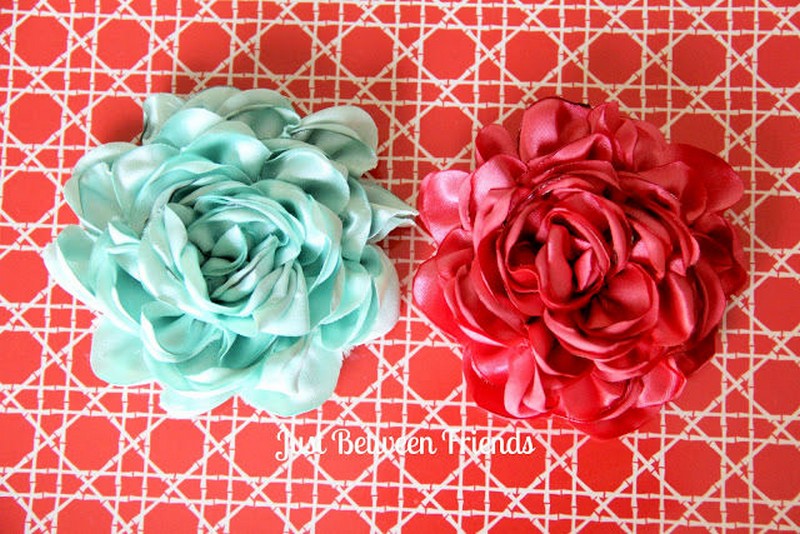
Making flowers is the best thing to get the most out of your fabric stash and here are these super fluffy and cutely colorful DIY fancy flowers to get your hands on. Making these adorable fabric flowers would offer you a variety of ways to use them around for the beautification of your things like bags, dresses, headbands, and bracelets. Check out the details here!
2. No-Sew Fabric Flowers DIY

Looking for some easy fabric Flower Ideas? if yes then here is the idea of making No-sew fabric flowers in just minutes. This is an easy and quick project. With just only a few folds of fabric, you have perfect fabric flowers for gift topper and home decor. The list of supplies includes fabric, some glue, and buttons. More details are here!
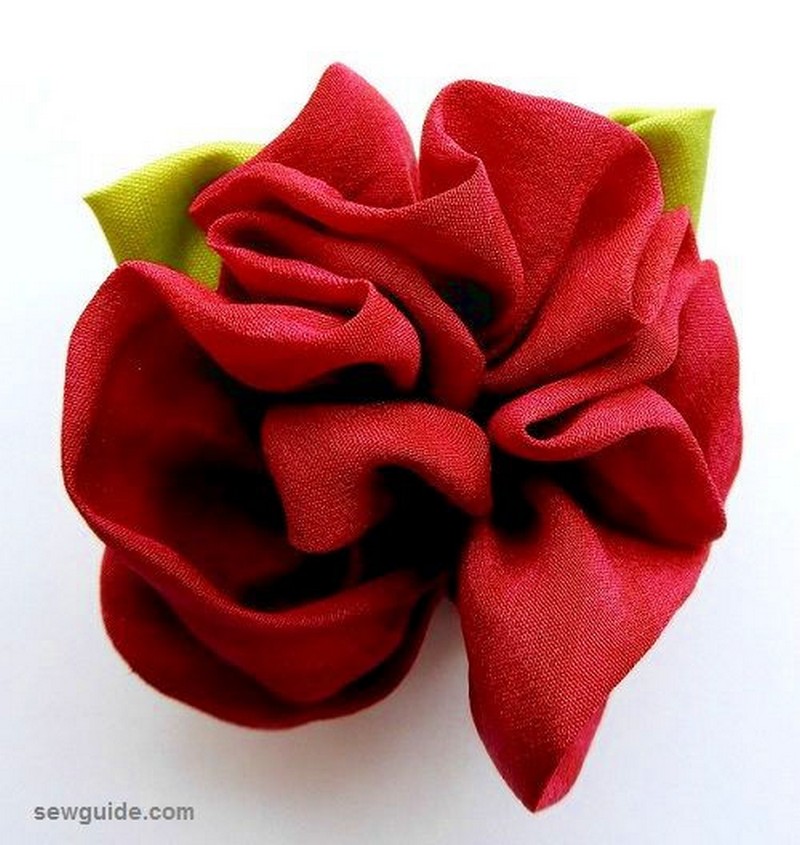
3. Rolled Rose Fabric Flower
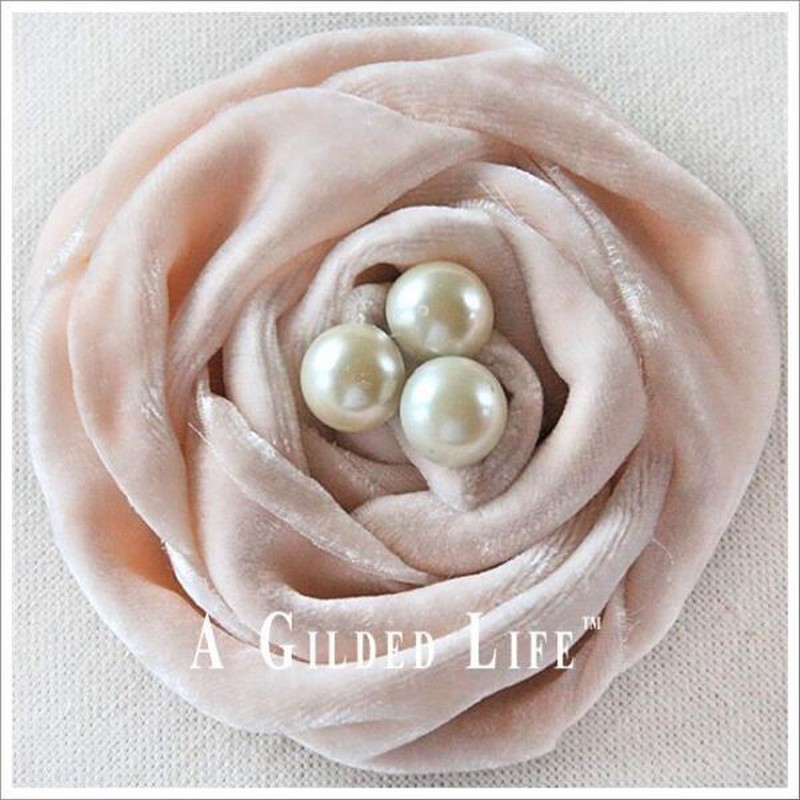
Make this lovely rolled rose fabric flower easy for your home decor. This is easy and quick to make. You can involve your kids in this cute and fun craft. This is No-sew and budget-friendly project. You just need to fold the fabric to make a rose shape, glue the felt circle at the back of the rose and add three buttons. The detailed plan is here!
4. Pom Pom Rosstes Idea
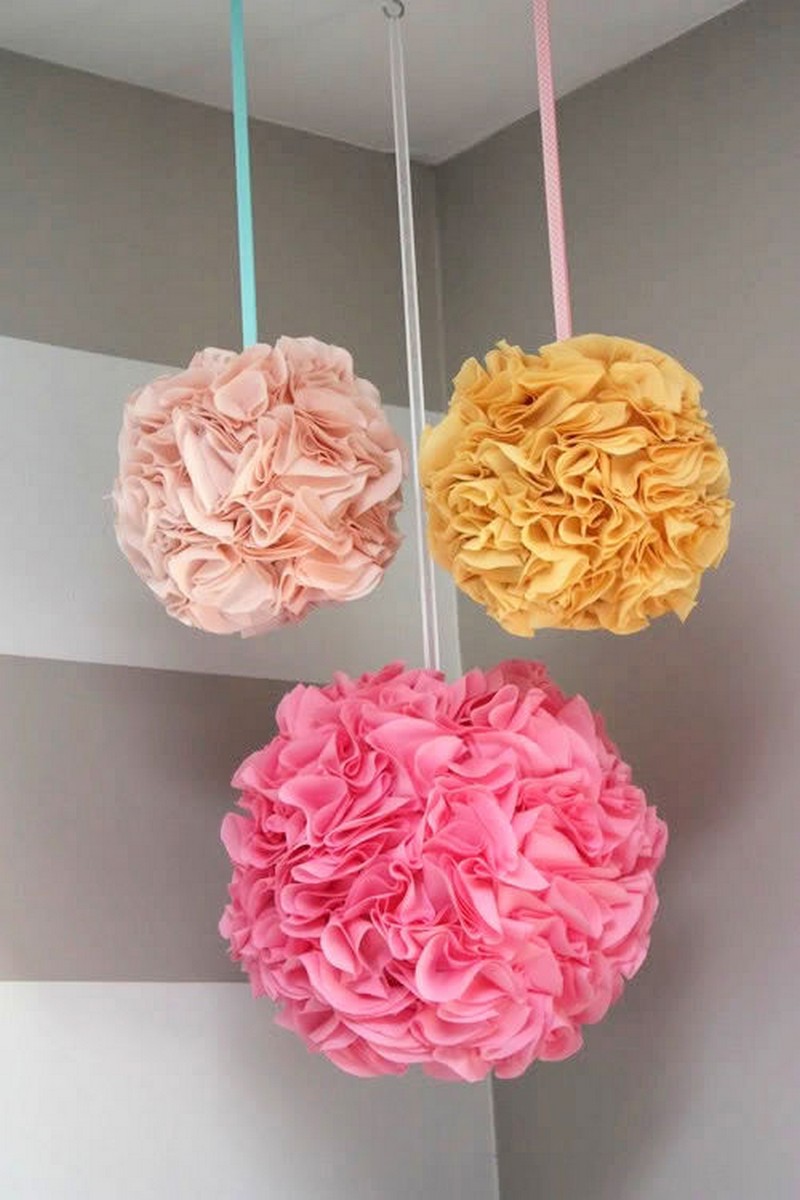
Here is the idea to bring some charm and beauty to your home decor. This pom pom rosettes idea is easy to make but takes some time to make folding of the circle. They are perfect for the room of your little girl. Stuff needed for this is paper lanterns, fabric, glue gun and ribbon. The detailed plan is here!
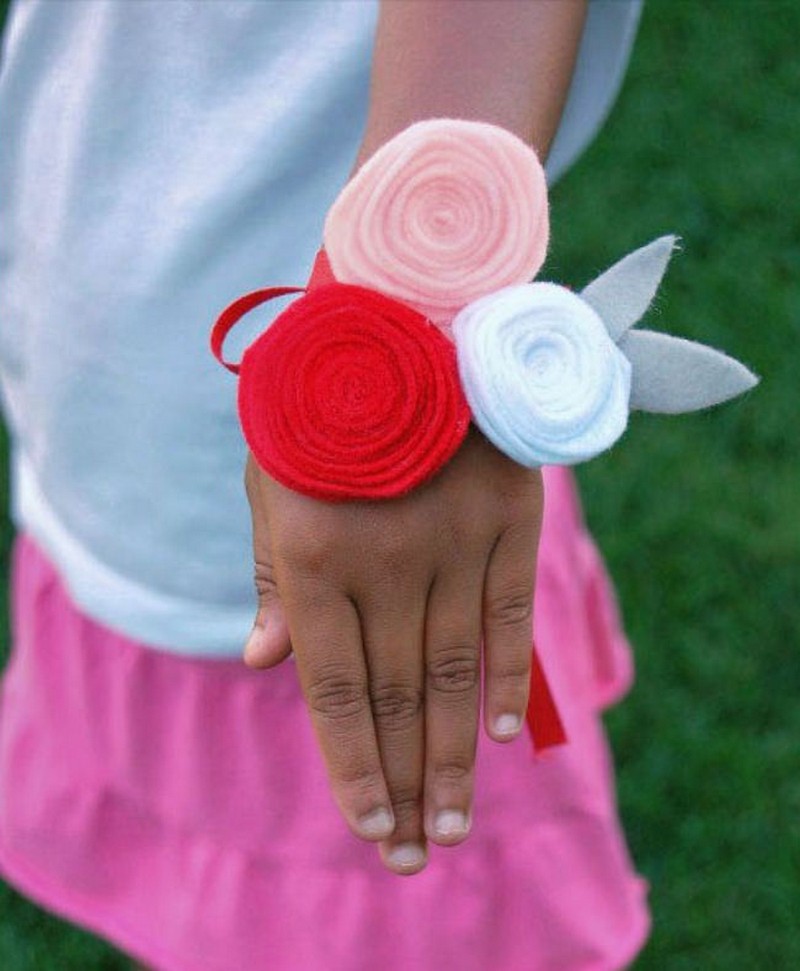
5. DIY Rolled Rosses For Baby
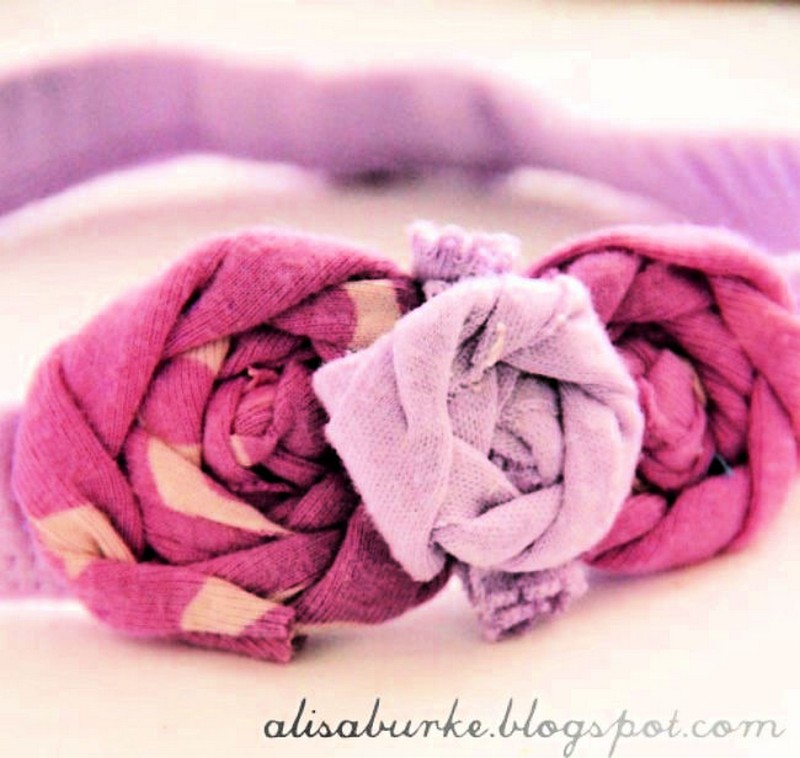
Make this lovely rolled rosses head band for your little baby. This is super inexpensive and quick to make in just moments. You just need some elastic for this purpose, make a rose from the scraps of the fabric and glue a button in the center of the rose. Now you have a cute little headband for your baby. Follow the details here!
6. Felt Flowers DIY
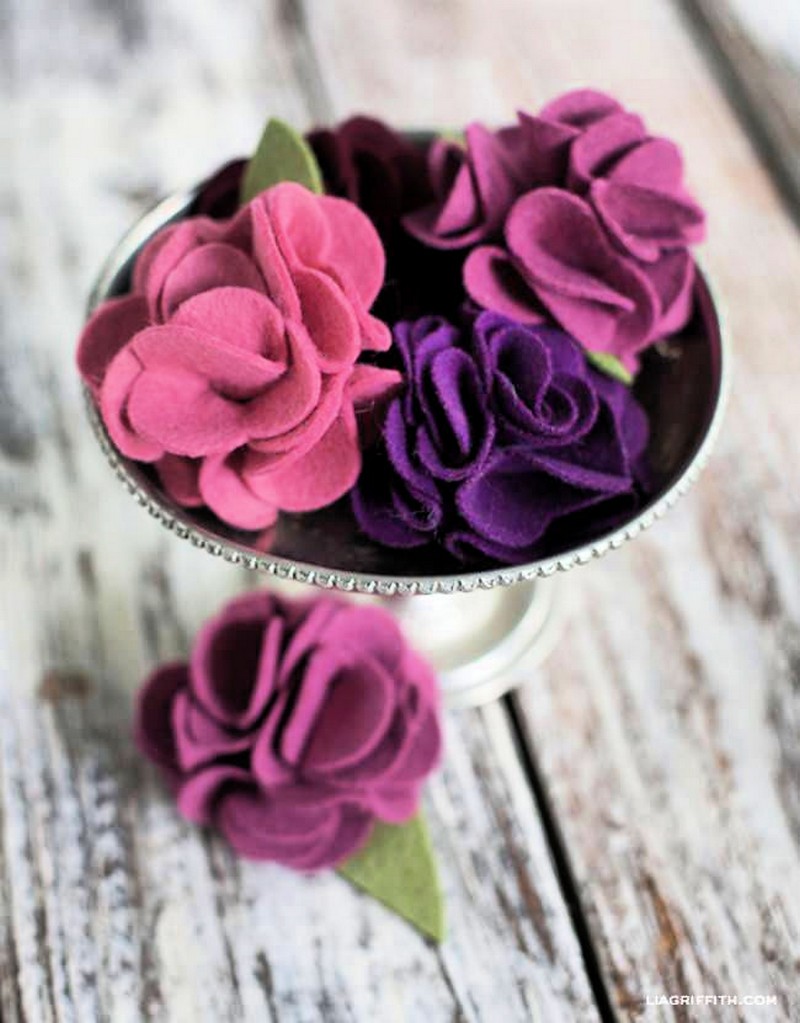
This felt flower idea is just amazing and fun craft you can enjoy with your kids. You can use these cute little felt flowers for gift toppers, for headbands and to clip on to your shoes. It will serve you well with its charm and beauty. This is easy and quick project for so many reasons. Supplies are felt, glue and scissors. The complete details are here!
7. DIY Felt Flower Corsage Idea
DIY felt flower corsage idea is simple and quick to make with no time and money. It is perfect for play dates, small birthday parties and for DIY gifts. The process is simple firstly cut the felt into a circle and then start cutting the circle into spiral. In last you need to roll the felt from middle and do this again with different colors of felt to make a lovely corsage. Stuff is felt, glue, ribbon and scissors. Details are here!
8. Sew Fabric Ponies & Rose
Here is this lovely idea of making these sew fabric ponies and rose. This is easy and fun project you can enjoy with your friends. They are perfect for your wedding bouquets, birthday parties and for home decor. You just need some thread needle skills and that’s it. Things like scraps of polyester fabric, a needle and thread and a DIY Candle. See more details here!
9. Long Stemmed Fabric Rosstes
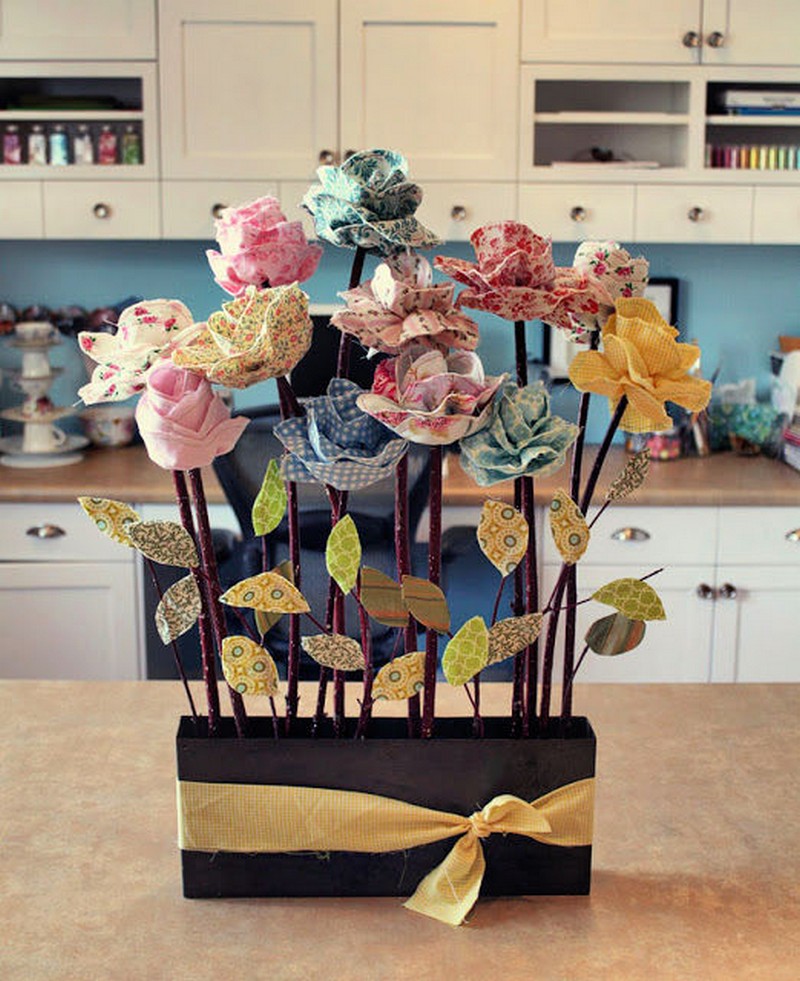
Looking for some cheap and adorable Home Decor Ideas? You have come to the place. These long stemmed fabric rossetes are perfect to suit your needs. They are simple to make but you need some sewing skills for this. This is a cheap idea and these fabric rossetes will look amazing in your window or on the spare shelves of your home. Supplies are fabric in various colors and designs, sewing machine, glue, wooden sticks, glue and scissors. Grab more details here!
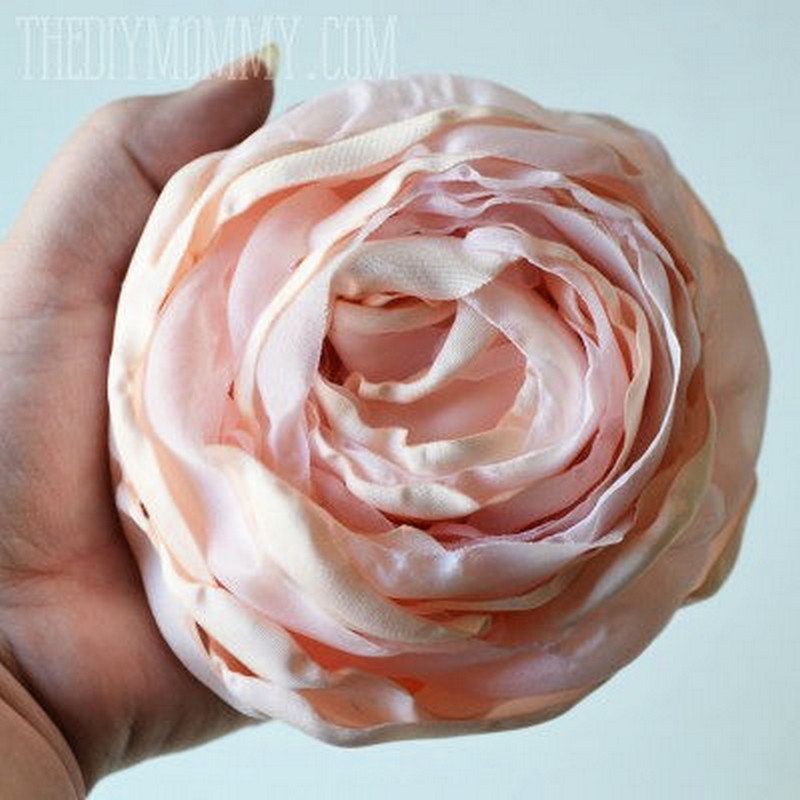
10. Realistic Fabric Rose Idea
Make these realistic fabric roses for you home decor. They are pretty simple and you can make some in less than one hour. They look perfect anywhere there is free space like on the walls of your home, dining table and shelves. You can gift this to your mom on mother’s day. For this budget friendly idea you will need a fabric, matching thread, scissors, ruler, measuring tape and sewing machine. You can see complete details here!
11. Belt Fabric Rosstes
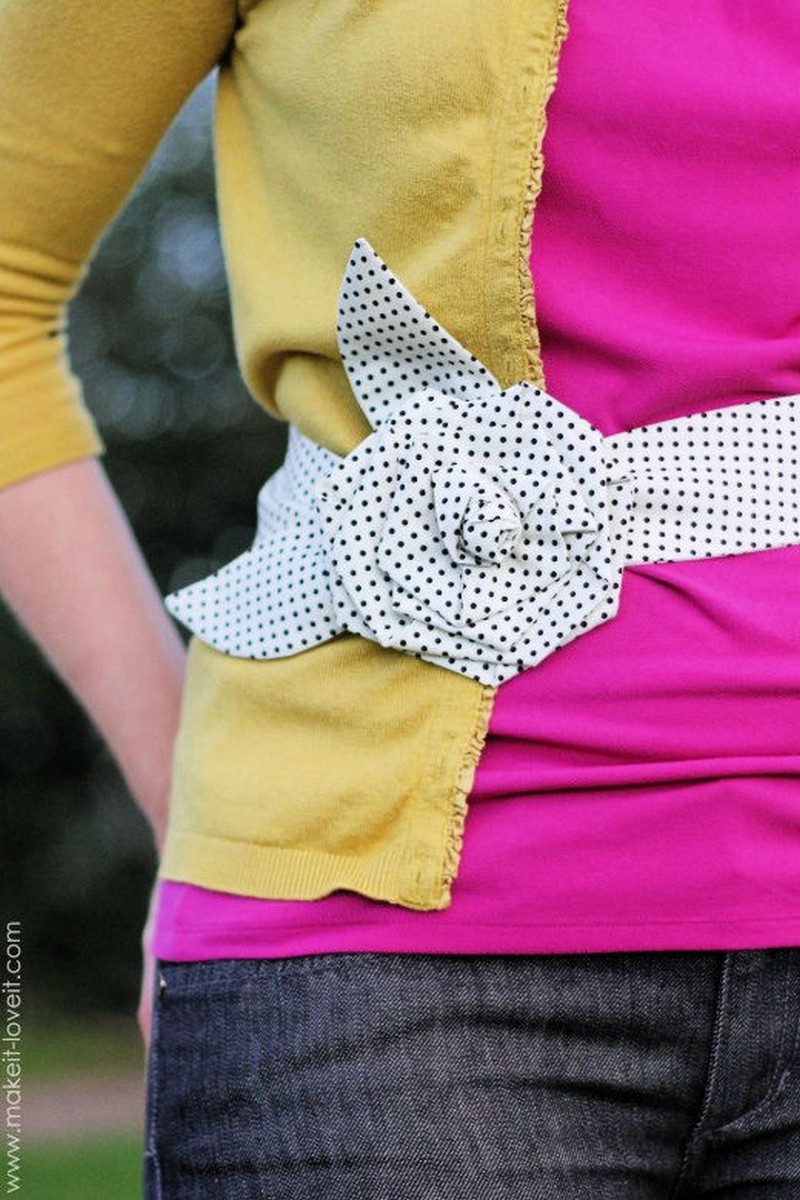
Here is this lovely idea of making a belt from fabric assets. This tured out great and work well with your outfits.this is easy and fun project to enjoy. This project is far from science just give a try. You can make this in various colors to match with your daily clothes. The stuff needed for this is fabric, a pencil, scissors, a needle, thread, and a ring. The detailed plan is here!
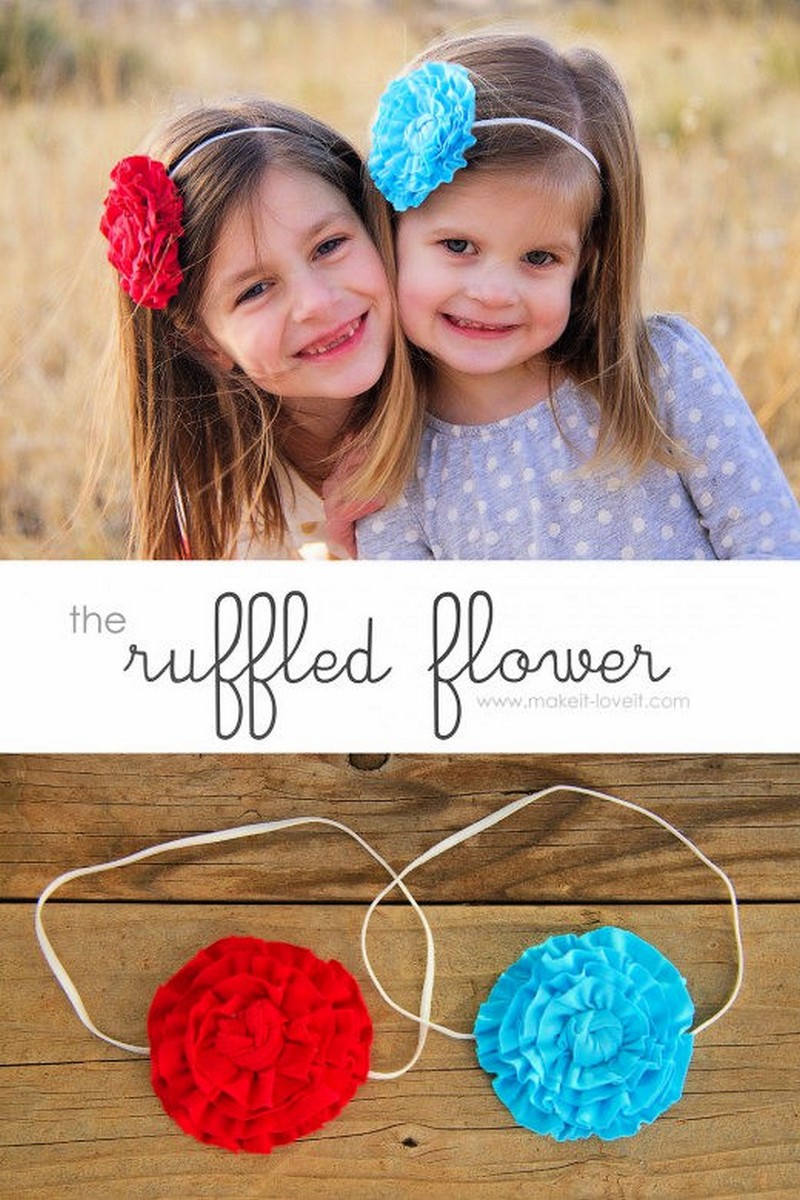
12. DIY Shirred Fabric Flowers
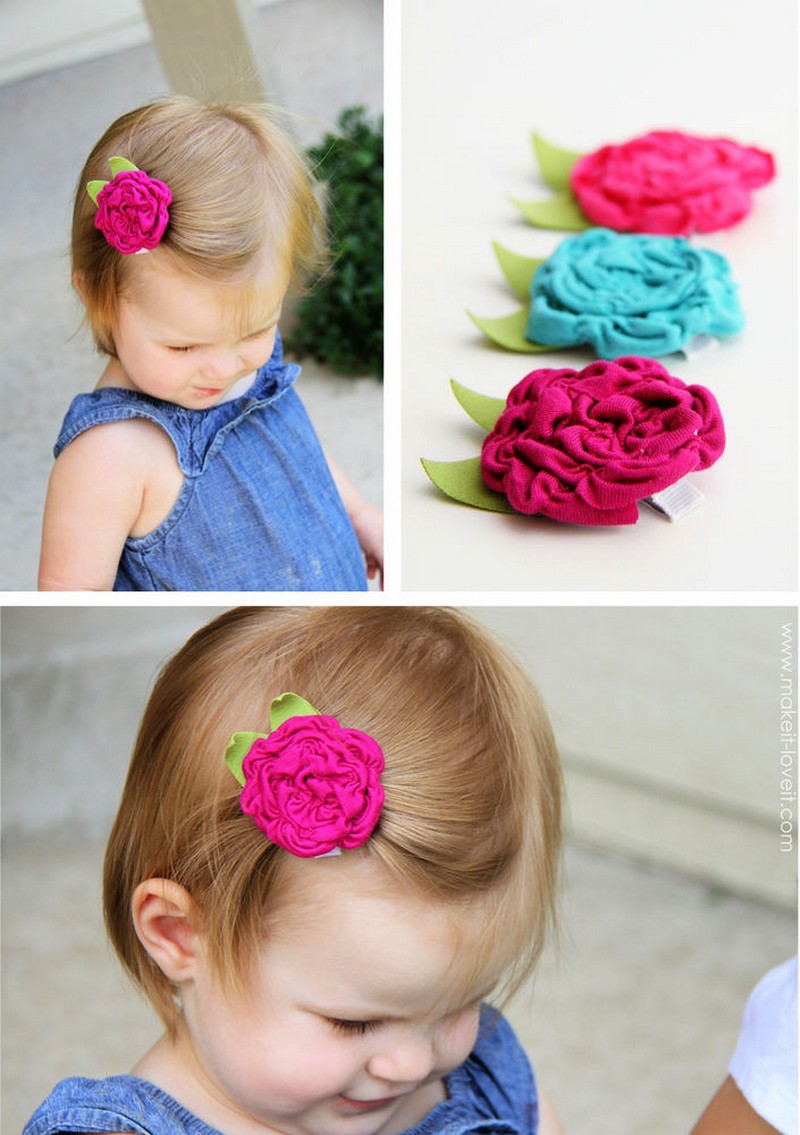
This DIY shirred fabric flowers are perfect for your kiddos this summer. This is easy and quick to make in less than 10 minutes. No money and skills needed for this. The best part there is no more twisting the shirred does it all for you. So these little clips of fabric flowers just look adorable on the head of your toddlers. Stuff needed is fabric, some glue, scissors and hair pins. The details are here!
13. Briliant Fabric Rosstes Idea
This brilliant fabric rossets idea will work well for you this summer. You can make lovely headbands with these fabric rossetes. They are easy and quick to make on low budget. You just need to fold the circles in half to make a taco shape. Do this for making a bunch and then glue them on a fabric. In last attach this to the headband. Supplies are fabric, simple headbands, scissors, glue and brads. Check out more details here!
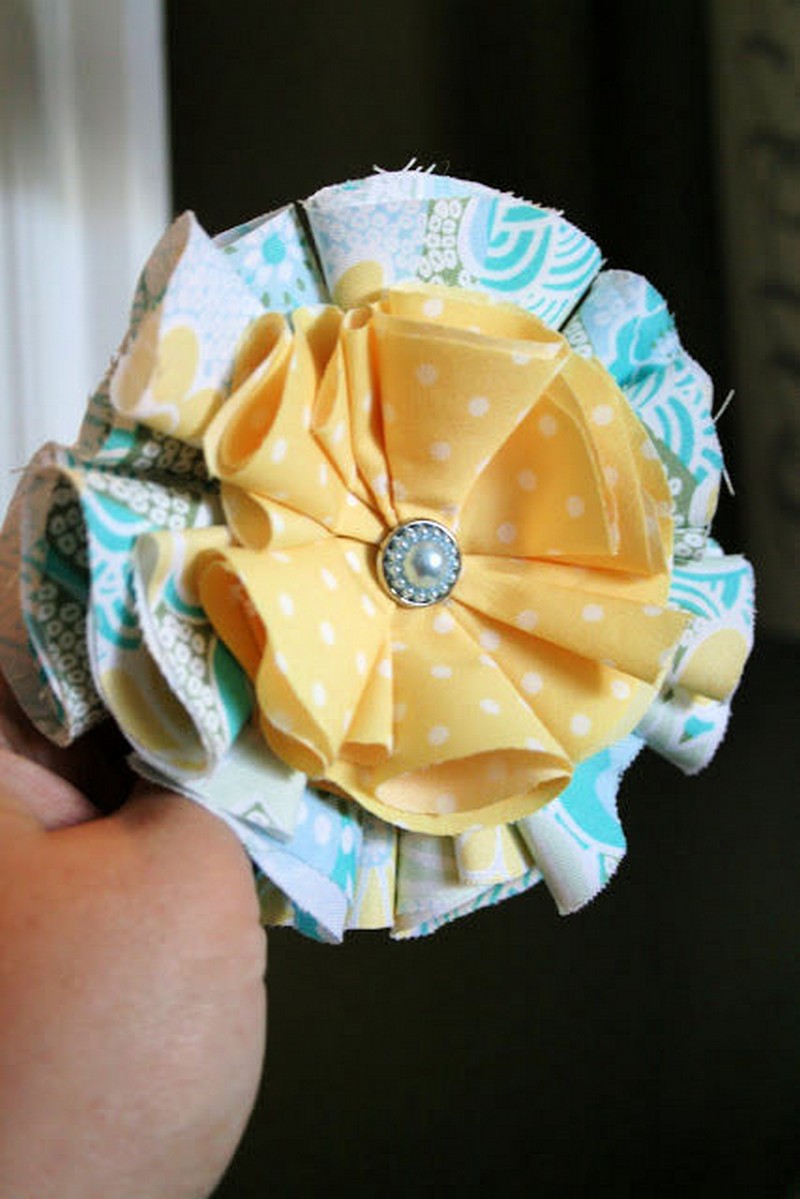
14. Pansy & Dahlia Fabric Flowers
Pansy and dahlia fabric flowers are just amazing to give to your mother, grandmother and daughter. They are easy but take plenty of time to make. For pansy you can use a template but for dahlia only scissors is main tool. They both are perfect for home and party decor as well. Required things are template, fabric sewing supplies, pin and fabric marking pen. Follow the details of the plan here!
15. DIY Fabric Flowers With Stiffened Petals
Make your own these cute little DIY fabric flowers with stiffened petals. These flowers will work for your home decor, parties, top gifts, and hair clips. You just need to cut the three-circle one is large than the other. Iron the corners to make a petal shape of the flower. Add a button in the center and stitch them. Now you have self-made these amazing fabric flowers. Material needed is stiffened fabric pieces, pencil, paper scissors, needle, thread, buttons, and iron. Check the details here!
16. DIY Felt Roses
This DIY felt rosstes is just another way to bring something adorable to your summer outfits. This is easy and doesn’t take much time. This will also work for your home decor, gift topper, and for a tree ornament. So if you decided to make you will need a red or cream felt or whatever color you want, scissors, glue gun, bar pins, acrylic gems, tape measure, and lid. Check the details here!
17. Fabric Flower Idea with Tutorial
Looking for the simplest and cheapest idea of making fabric flowers? This fabric flower is so easy to make with super simple things in hand. you just need to the fabric first and then cut the circles from small to big. You need a candle to sing the edges of your petals. Sew them from small to bigger and that’s it. You add beads and buttons if desire. Supplies are fabric, candle, thread, and needle. Details are here!
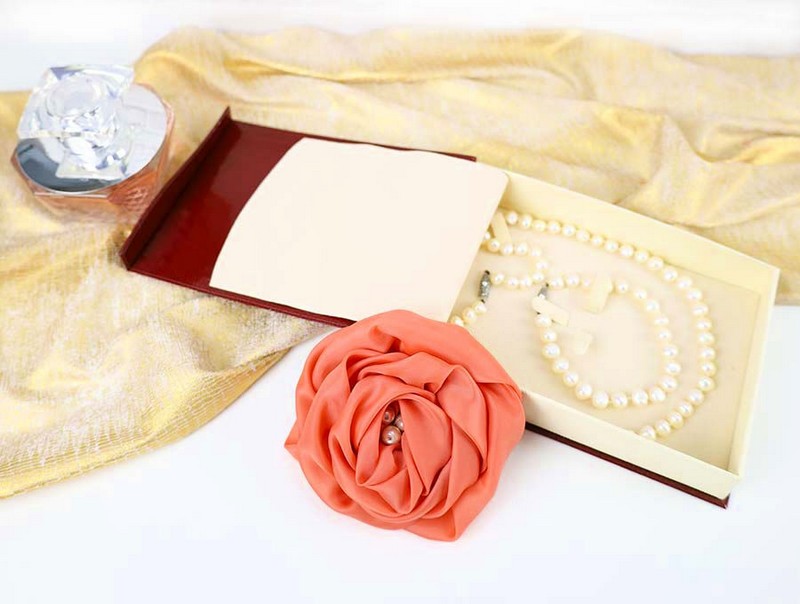
18. Ruffle Chiffon Flower
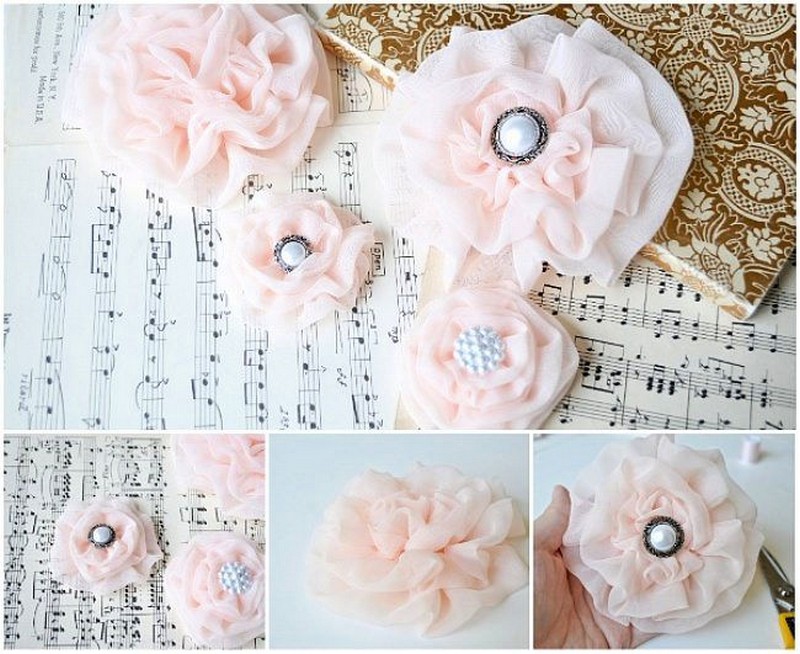
Here is the idea of making these cute little ruffle chiffon flowers easily. this looks so adorable to look at. You can make your home decoration even more attractive with these budget-friendly flowers. You can use them for Christmas gifts, gift toppers,s and for your mother on mother’s day. The stuff required is fabric, glue, scissors, and buttons or beads. The complete details of the idea are here!
19. A Scrappy Strip Rose DIY
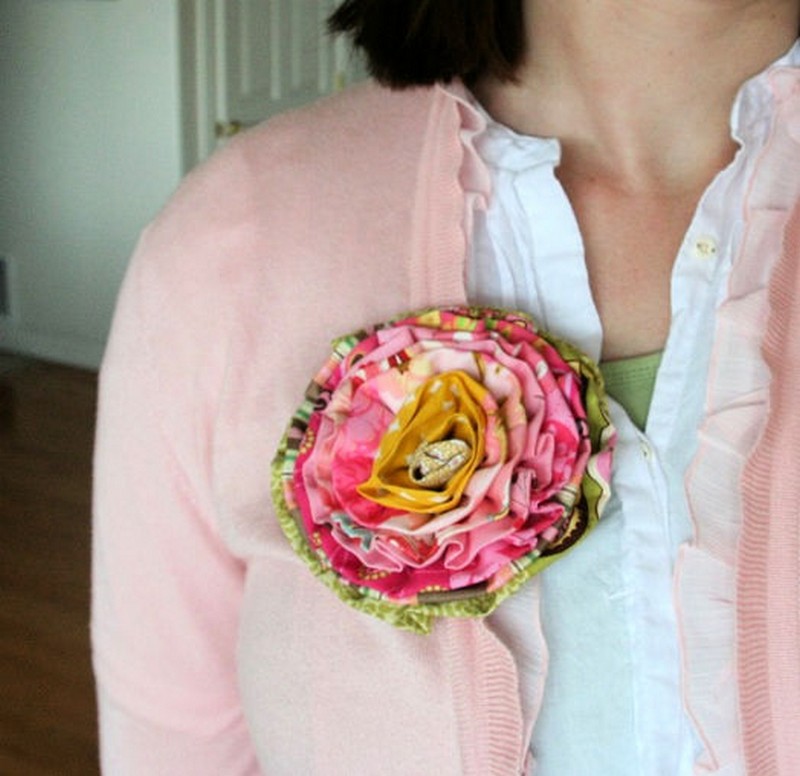
This scrappy strip rose DIY is a perfect idea to make some lovely fabric flowers from the scraps. This is easy but you need some sewing skills for this. Once you made them look adorable on your jacket, on your bag, and on the walls of the homes. Supplies are scraps of fabric, scissors, needle, thread, sewing machine, piece of felt, hot glue with a glue gun, and a broach bracket. Grab more details here!
20. Sweater Flower Tutorial
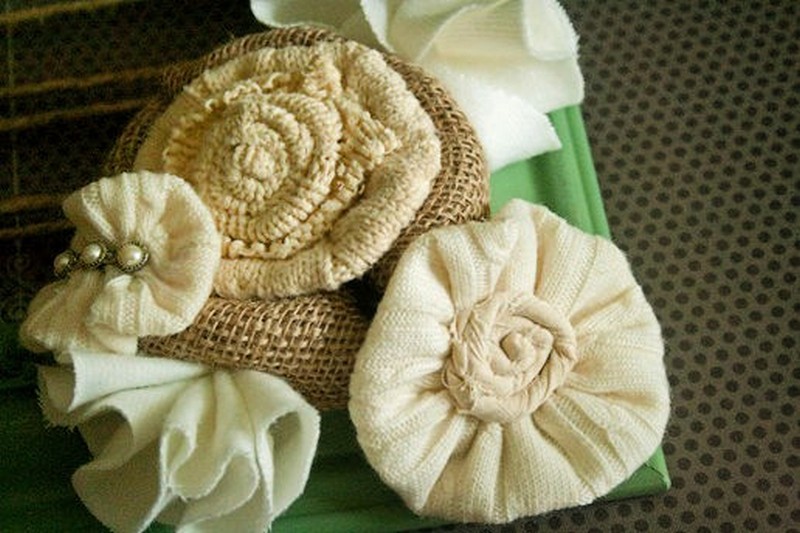
This sweater flower is the best idea to get something adorable from the old sweaters. This is an easy and quickest idea to make a sweater flower. This is a budget-friendly and beginner-free idea. You need to be some handy with needle and thread and that’s enough to make these cute flowers. Stuff is an old sweater, needle, thread, scissors, and buttons or beads. Check the detailed plan here!
21. DIY Ruffled Rosstes
These ruffled roses are just amazing to add a little charm to your jackets, shirts, headbands, gift toppers, and to your handbags. They are so easy to put together with no time and money. If you decided to make pick up some old t-shirts and other things like felt, scissors, sewing machine, and pins. You can see more details of the idea here!


