Why Choose a Recycled Milk Jug Watering Can?
Transforming an ordinary plastic milk jug into a stylish watering can is a brilliant way to reduce waste while adding unique charm to your garden. Recycled milk jug watering cans combine eco‑friendly practices with creative expression, making them perfect for sustainability‑minded DIYers. These upcycled tools are lightweight, durable, and easy to customize using affordable supplies such as chalk paint, jute twine, or floral decoupage paper. By repurposing milk jugs, gardeners avoid single‑use plastics and give new life to an item that might otherwise end up in landfills. The process also offers a satisfying crafting experience that can be enjoyed alone or as a weekend project with friends and family. Moreover, a personalized watering can coordinates seamlessly with your outdoor décor, whether you prefer a rustic farmhouse aesthetic, boho chic flair, or modern geometric design. As interest in sustainable gardening grows, crafting a recycled milk jug watering can not only showcases your eco‑prowess but also inspires others to embrace green living and inventive garden hacks.
Top Techniques to Transform Your Milk Jug
Creating a standout recycled milk jug watering can begins with gathering versatile supplies like spray paints, natural twine, or small plant pots. Popular techniques include chalk painting in soft pastels for a shabby‑chic appeal, marbling with nail polish to achieve an elegant swirl effect, or copper spray painting for an industrial edge. For a bohemian twist, macramé hangers or layered acrylic tribal patterns bring eye‑catching texture and color. Twine wrapping and lace trim add a cozy, vintage vibe, while stenciled garden quotes personalize each piece with uplifting messages. Succulent‑topped designs double as living planters, blending function and décor in one. Whether you choose geometric masking tape patterns or floral decoupage motifs, each method relies on simple steps and common craft materials. By following detailed tutorials and experimenting with color schemes, you’ll produce a watering can that’s as practical as it is Instagram‑worthy—proof that sustainable style can flourish in any backyard or balcony garden.
1. Fresh Farmhouse Flair Milk Jug Watering Can
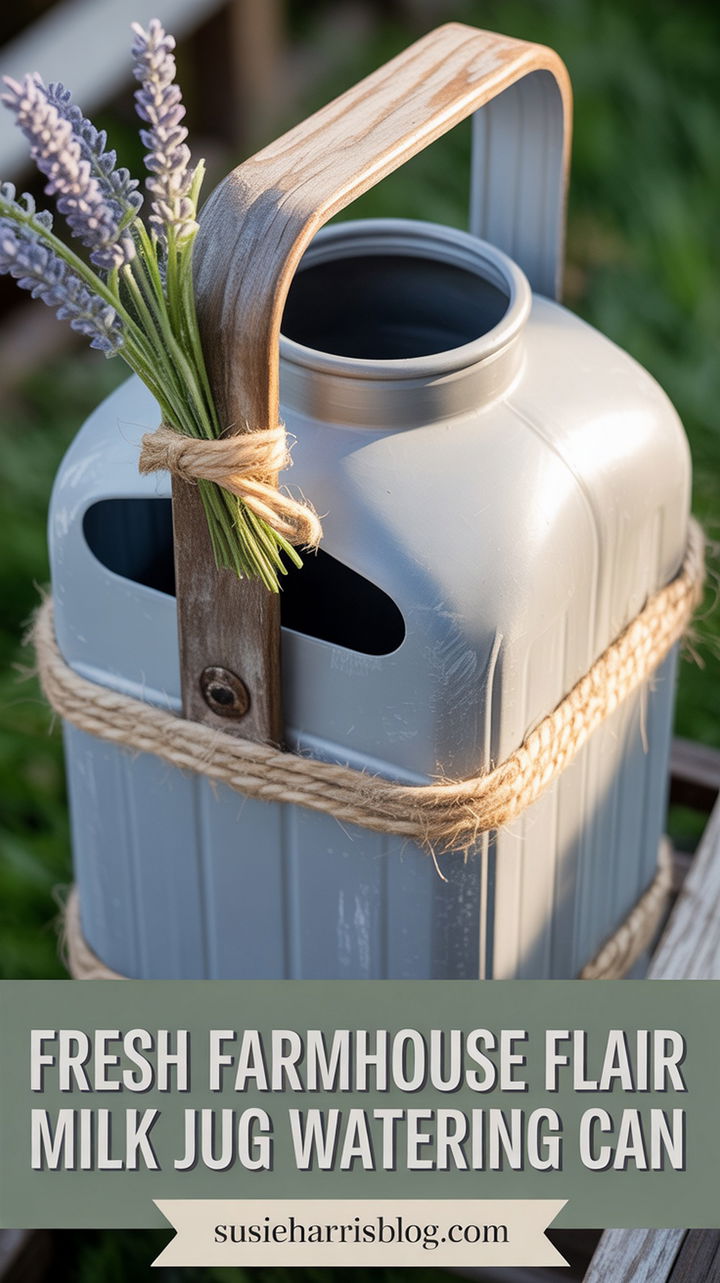
Bring a touch of country charm to your garden with this Fresh Farmhouse Flair Milk Jug Watering Can. Start by lightly sanding an old plastic milk jug to help paint adhere. Apply two coats of matte white chalk paint, letting each layer dry fully. Next, distress edges gently with fine-grit sandpaper for that authentic farmhouse look. Attach a reclaimed wooden handle—salvaged from an old drawer or fence picket—using heavy-duty twine knotted securely around the jug’s neck. Finish with a sprig of faux lavender tied at the base of the handle for a fragrant accent. This DIY milk jug watering can not only breathes new life into discarded plastic but also elevates your outdoor décor with a rustic aesthetic. Perfect for watering potted herbs or small floral beds, it’s a sustainable project that merges function and farmhouse style seamlessly.
Supplies
• Plastic milk jug (cleaned, label removed)
• Matte white chalk paint
• Fine‑grit sandpaper
• Reclaimed wooden handle or small wood plank
• Natural jute twine
• Faux lavender sprigs
• Paintbrush
2. Boho Chic Milk Jug Watering Can Makeover
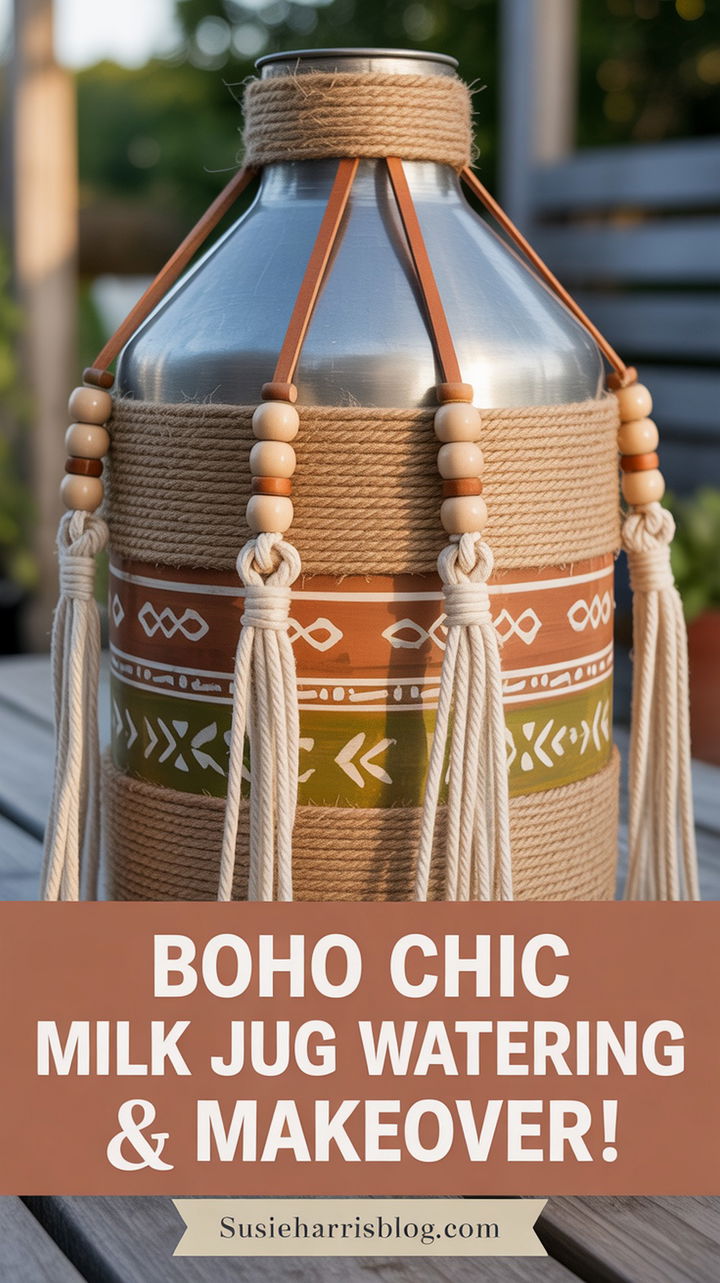
Transform a humble milk jug into a Boho Chic Milk Jug Watering Can that doubles as a decorative statement piece. Begin by wrapping natural jute cord around the jug in alternating bands, securing the ends with a small dab of hot glue. Add layers of macramé fringe around the base of the handle for playful texture. Use acrylic paints in earthy tones—mustard yellow, terracotta, and olive green—to create tribal-inspired patterns across the body, freehand or with stencils. Embellish with wooden beads strung on thin leather strips and tied around the neck. The result is a versatile watering can that exudes cozy bohemian energy, perfect for sipping water into succulent arrangements or bright blooms. Ideal for porches, patios, or boho-themed gardens, this upcycled piece champions eco-friendliness while celebrating artisanal flair.
Supplies
• Plastic milk jug (cleaned)
• Natural jute cord
• Macramé fringe trim
• Acrylic paints in mustard, terracotta, olive
• Foam brushes or small paintbrushes
• Wooden beads
• Thin leather cord
• Hot glue gun and glue sticks
3. Pastel Ombre Milk Jug Watering Can
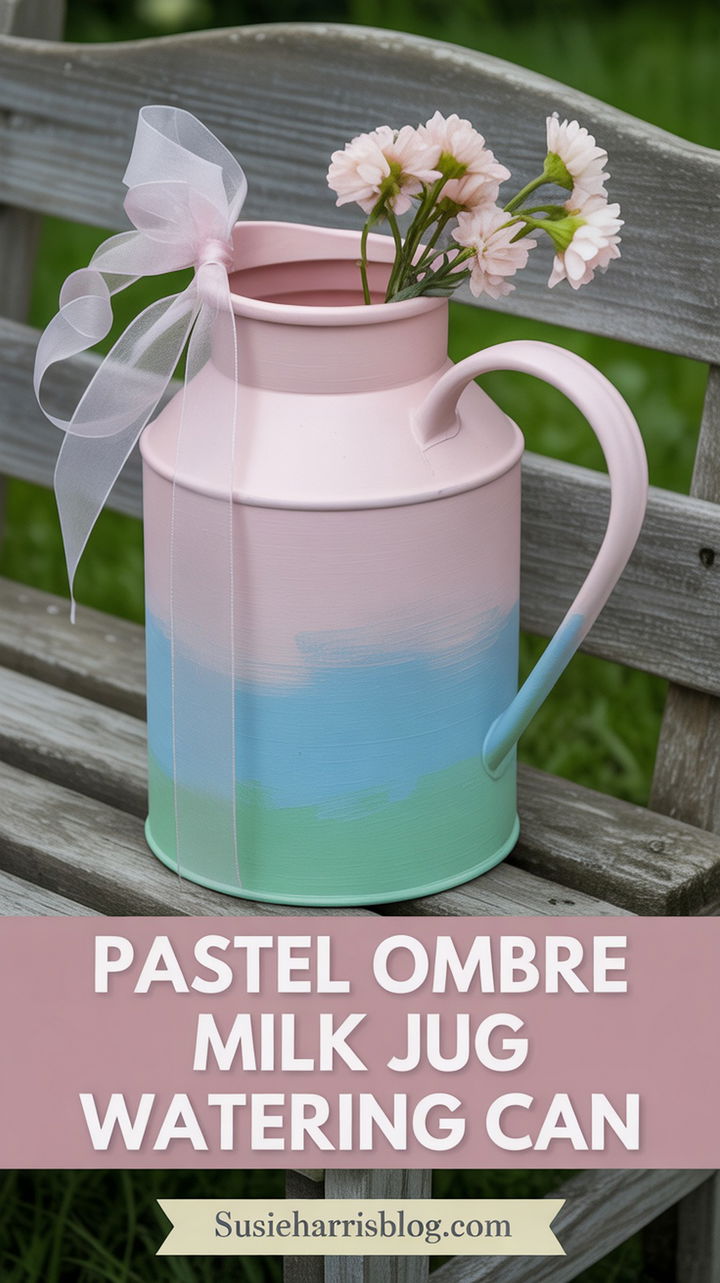
Elevate your garden tools with a soft gradient effect in this Pastel Ombre Milk Jug Watering Can tutorial. Clean and dry a plastic milk jug thoroughly before applying painter’s tape around the handle to protect it. Choose three complementary pastel spray paint colors—such as blush pink, sky blue, and mint green—and spray in horizontal bands, overlapping each hue slightly to achieve a seamless ombre transition. Let paint dry completely, then remove tape and lightly sand any rough edges. For extra whimsy, tie a sheer organza ribbon around the neck and affix a small faux flower. This dreamy watering can is perfect for styling garden parties or adding a subtle pop of color to your flower beds. Its gentle gradient finish ensures your DIY project looks professionally crafted.
Supplies
• Plastic milk jug (cleaned)
• Painter’s tape
• Pastel spray paint (three colors)
• Sheer organza ribbon
• Faux mini flowers
• Drop cloth or protective newspaper
4. Twine Wrapped Rustic Milk Jug Watering Can
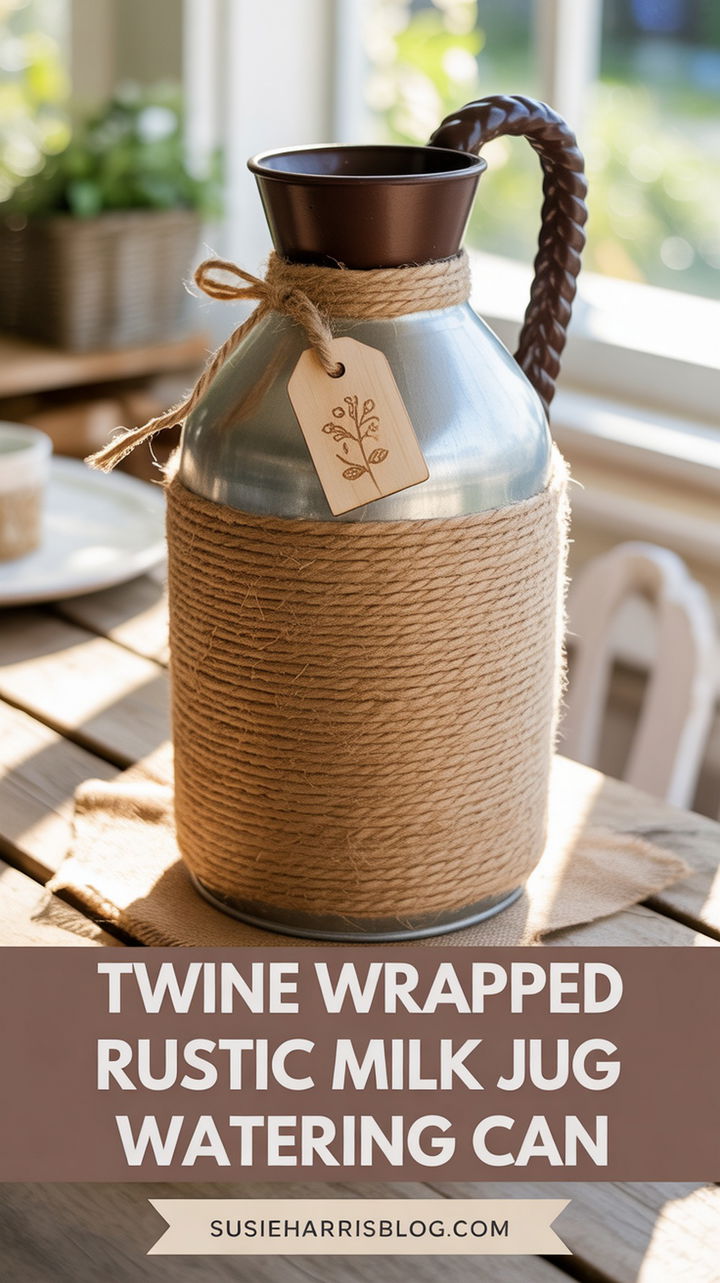
Create a cozy, rustic accent with this Twine Wrapped Rustic Milk Jug Watering Can DIY. Start by cleaning your milk jug and removing any labels. Using a hot glue gun, attach natural jute twine at the bottom edge and wrap tightly around the jug in continuous coils up to the neck. For the handle, weave a contrasting darker twine in a simple braid and bind it around the existing spout area. Add a small wooden tag punched with a garden-themed word like “grow” or “bloom,” tied with thin raffia. The textured surface insulates the water, keeping it cool, and adds a timeless rural aesthetic. Perfect for cottage gardens, this upcycled watering can also stores small gardening tools or plant markers when not in use.
Supplies
• Plastic milk jug (cleaned)
• Natural jute twine (thick)
• Dark‑brown twine (for handle braid)
• Hot glue gun and glue sticks
• Small wooden tag
• Thin raffia ribbon
5. Floral Decoupage Milk Jug Watering Can
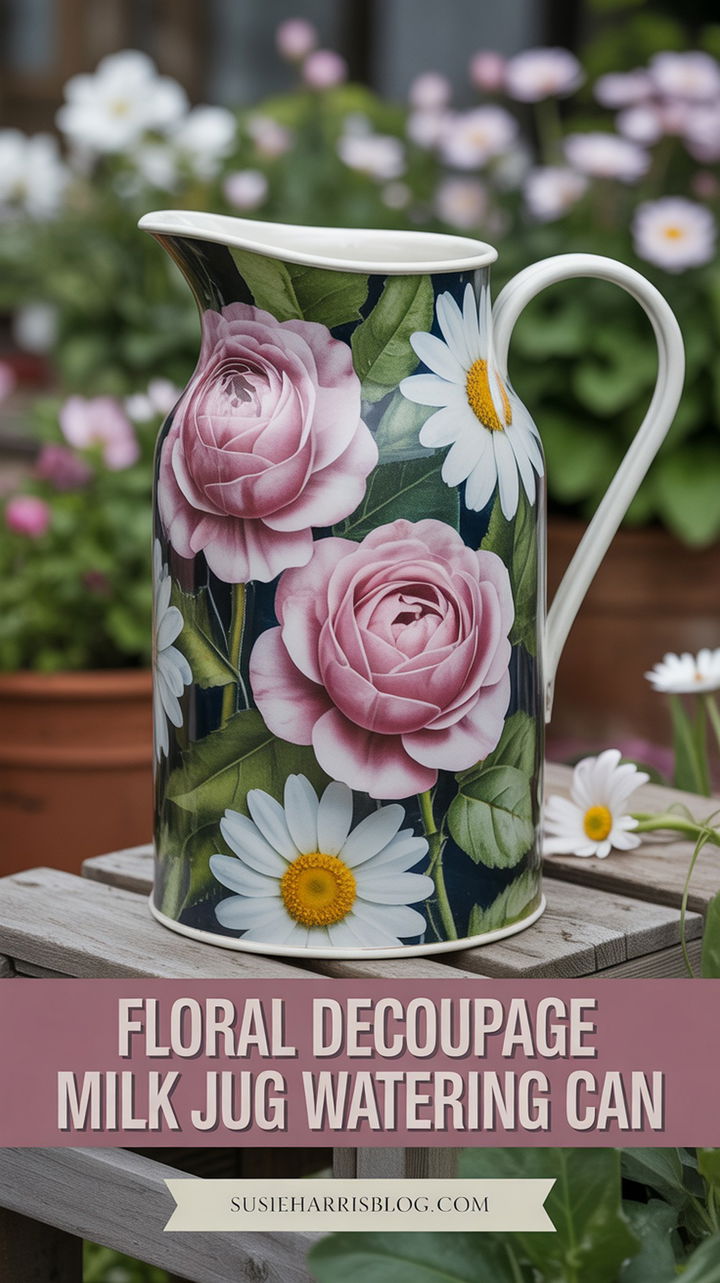
Infuse vintage charm into your garden with a Floral Decoupage Milk Jug Watering Can. Gather scrapbooking paper or napkins with delicate rose, peony, or daisy prints. After cleaning and priming the milk jug, cut floral motifs and arrange them on the surface. Use decoupage medium to adhere each piece, smoothing out wrinkles and bubbles. Once dry, seal with two coats of clear matte varnish. Paint the handle in a soft pastel hue that picks up one of the flower’s colors. This decorative watering can doubles as a centerpiece for garden parties or a unique gift for plant lovers. The decoupage finish resists moisture and maintains vibrancy, ensuring your upcycled piece remains a garden favorite season after season.
Supplies
• Plastic milk jug (cleaned, primed)
• Floral patterned napkins or scrapbook paper
• Decoupage medium (Mod Podge)
• Clear matte varnish
• Fine‑tip scissors
• Small paintbrush for decoupage
• Pastel acrylic paint (for handle)
6. Chalk Paint Pastel Milk Jug Watering Can
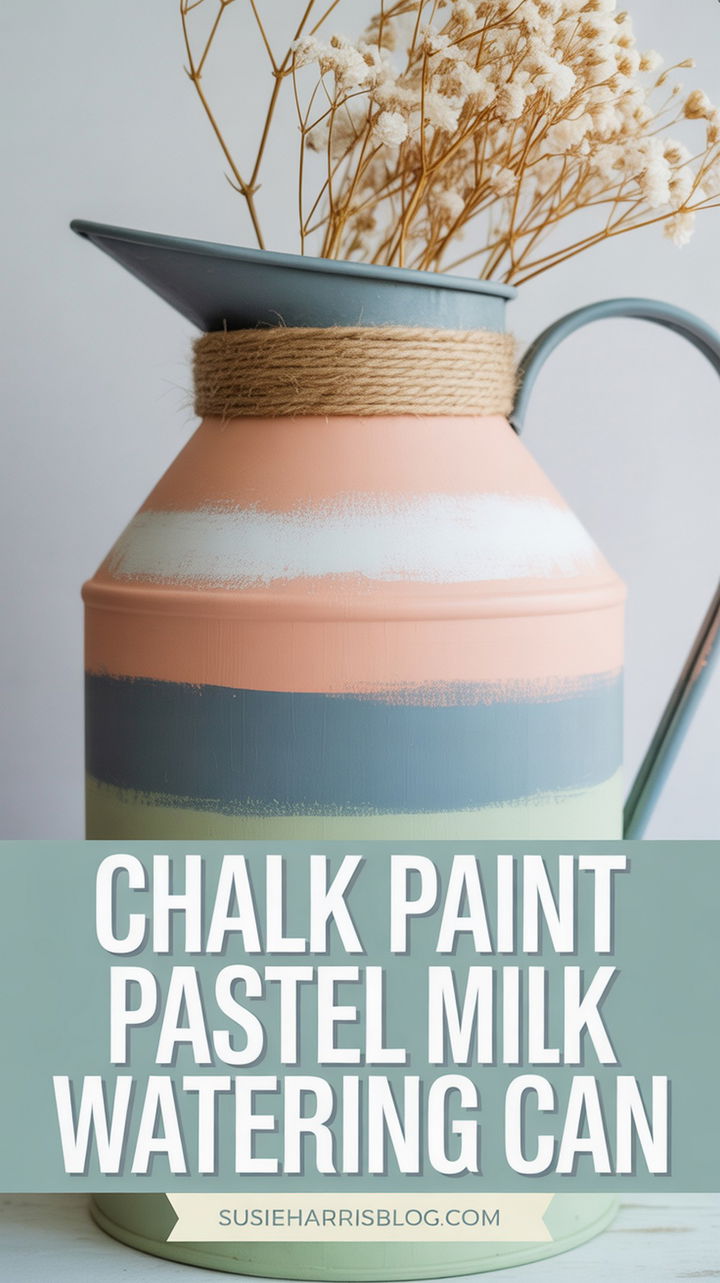
Embrace shabby-chic flair with this Chalk Paint Pastel Milk Jug Watering Can project. Select three chalk paint colors—pale peach, powder blue, and mint—and apply each in horizontal stripes of uneven widths for an artsy look. Between layers, use a damp cloth to slightly wipe away paint for a distressed finish. After drying, seal with clear wax or a matte varnish. Wrap the handle with soft cotton twine and tie a small cluster of dried baby’s breath or wheat stalks at the base. This DIY watering can adds a soft, romantic hue to any flower bed and is gentle enough for delicate seedlings. Plus, chalk paint adheres beautifully to plastic, making this a quick and budget-friendly craft.
Supplies
• Plastic milk jug (cleaned)
• Chalk paint in peach, powder blue, mint
• Damp cloth (for distressing)
• Clear matte wax or varnish
• Cotton twine
• Dried baby’s breath or wheat stalks
7. Marbled Effect Milk Jug Watering Can
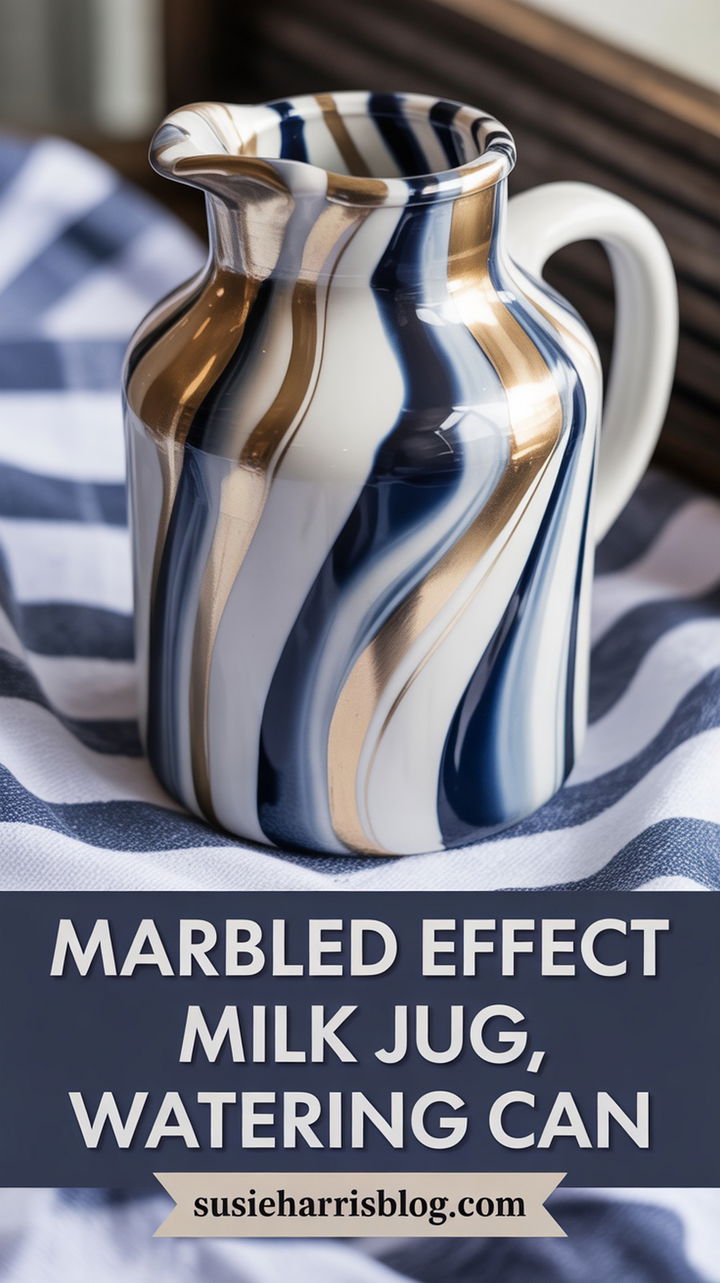
Achieve an artful finish with this Marbled Effect Milk Jug Watering Can tutorial. Fill a shallow container with water and drip in two or three oil-based nail polish colors that complement each other—think white, gold, and navy. Swirl gently with a toothpick to create a marble pattern on the water’s surface. Dip the clean milk jug sideways, rotating slowly to transfer the marbled design. Let dry upright for a flawless finish. Seal with a clear gloss spray to protect the pattern. The resulting watering can doubles as a sculptural piece in your outdoor space, perfect for those who love unique artisanal designs. Its eye-catching marbled surface also makes for a memorable garden gift.
Supplies
• Plastic milk jug (cleaned)
• Shallow container for water
• Oil‑based nail polish (three coordinating colors)
• Toothpicks for swirling
• Clear gloss spray sealant
• Disposable gloves
8. Copper Spray Milk Jug Watering Can
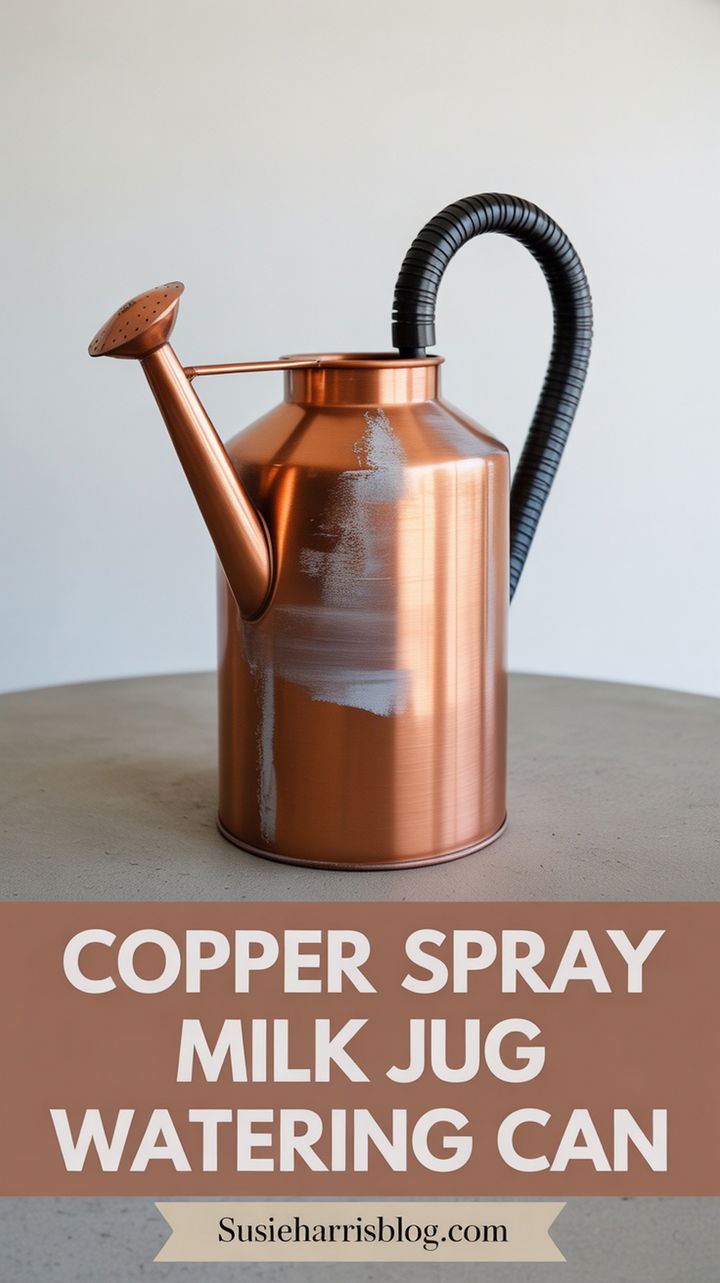
Give your recycled jug an industrial edge with a Copper Spray Milk Jug Watering Can makeover. Prime the surface and apply two even coats of metallic copper spray paint, allowing proper ventilation and drying time between layers. For added detail, lightly sand high points for a worn metal patina. Wrap the handle with black electrical tape to mimic insulated copper piping. Affix small copper pipe fittings or garden-themed charms using epoxy for authentic hardware accents. This sleek, modern watering can stands out against lush greenery, pairing effortlessly with minimalist or industrial garden décor. Its metallic finish is durable against weathering, making it both a functional tool and a design-forward accessory.
Supplies
• Plastic milk jug (cleaned, primed)
• Metallic copper spray paint
• Sandpaper (medium grit)
• Black electrical tape
• Small copper pipe fittings or garden charms
• Epoxy adhesive
9. Succulent Topped Milk Jug Watering Can
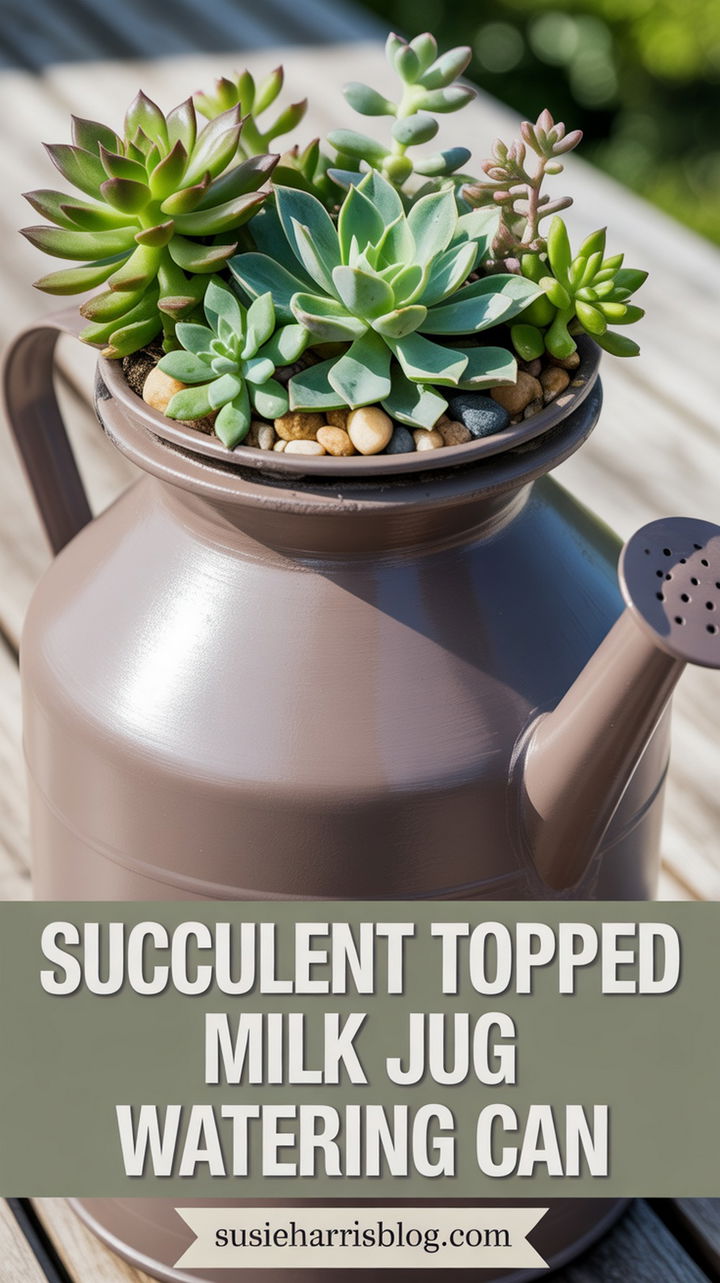
Combine form and function with this Succulent Topped Milk Jug Watering Can project. After cleaning the jug, cut a small opening on its top surface just large enough for a 2‑inch pot. Paint the exterior in a neutral tone—cream or taupe—using weatherproof spray paint. Plant a hardy succulent arrangement in the inserted pot, using potting mix and small pebbles for drainage. This living accent adds greenery and texture to your watering can, creating a mini garden you can carry. Ideal for gifting, it serves as both a planter and a watering tool. Change out succulents seasonally or leave as a permanent living sculpture in your home or garden.
Supplies
• Plastic milk jug (cleaned)
• Small plastic succulent pot (2 in.)
• Weatherproof spray paint (cream or taupe)
• Potting mix for succulents
• Succulent cuttings or seedlings
• Pebbles for drainage
10. Hanging Macrame Milk Jug Watering Can
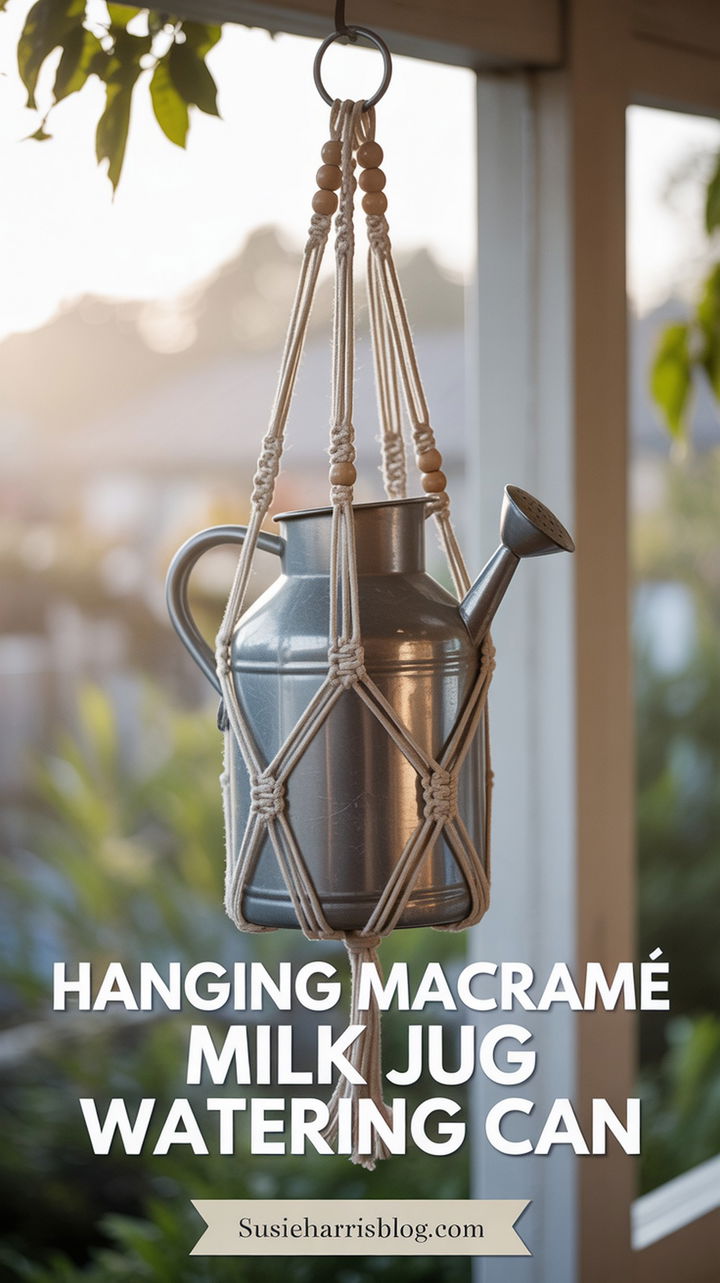
Elevate your DIY game with this Hanging Macrame Milk Jug Watering Can design. Use macrame cord to create a symmetrical net pattern that securely cradles your milk jug. Begin with a ring at the top, knotting cords evenly, then form square knots and spiral stitches to build the pattern. Place the jug inside, ensuring the handle aligns with the hanging loop. Style with wooden beads interspersed along the cords for a bohemian accent. Hang from a hook under a porch eave or balcony railing. This project yields a functional watering can that doubles as a hanging plant holder when not in use, perfect for small spaces or urban gardens seeking vertical greenery.
Supplies
• Plastic milk jug (cleaned)
• Macramé cord (natural cotton)
• Metal or wooden hanging ring
• Wooden beads (optional)
• Scissors
• Measuring tape
11. Stenciled Garden Quotes Milk Jug Watering Can
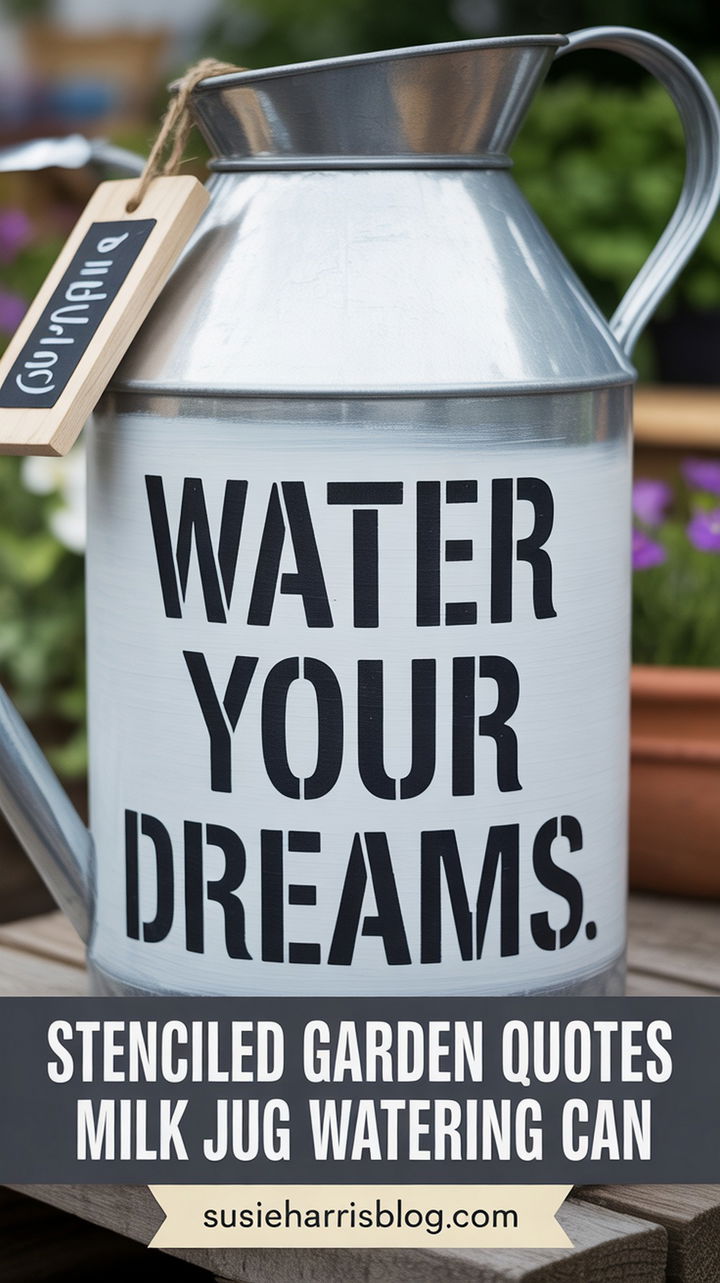
Personalize your toolset with a Stenciled Garden Quotes Milk Jug Watering Can. Choose a motivational or whimsical garden phrase—“Bloom Where You’re Planted,” “Water Your Dreams,” or “Grow Wild.” Secure letter stencils on a clean, primed jug and apply exterior-grade acrylic paint with a foam roller. Remove stencils carefully to avoid smudges. Seal with clear spray varnish. Finish by tying a small chalkboard tag around the handle to change quotes seasonally. This statement piece inspires every watering session and makes for a thoughtful gift. Its resin-sealed lettering withstands outdoor conditions, ensuring your favorite garden mantra stays vibrant.
Supplies
• Plastic milk jug (primed)
• Letter stencils (garden quotes)
• Exterior‑grade acrylic paint
• Foam roller or stencil brush
• Chalkboard tag and chalk marker
• Clear spray varnish
12. Geometric Painted Milk Jug Watering Can
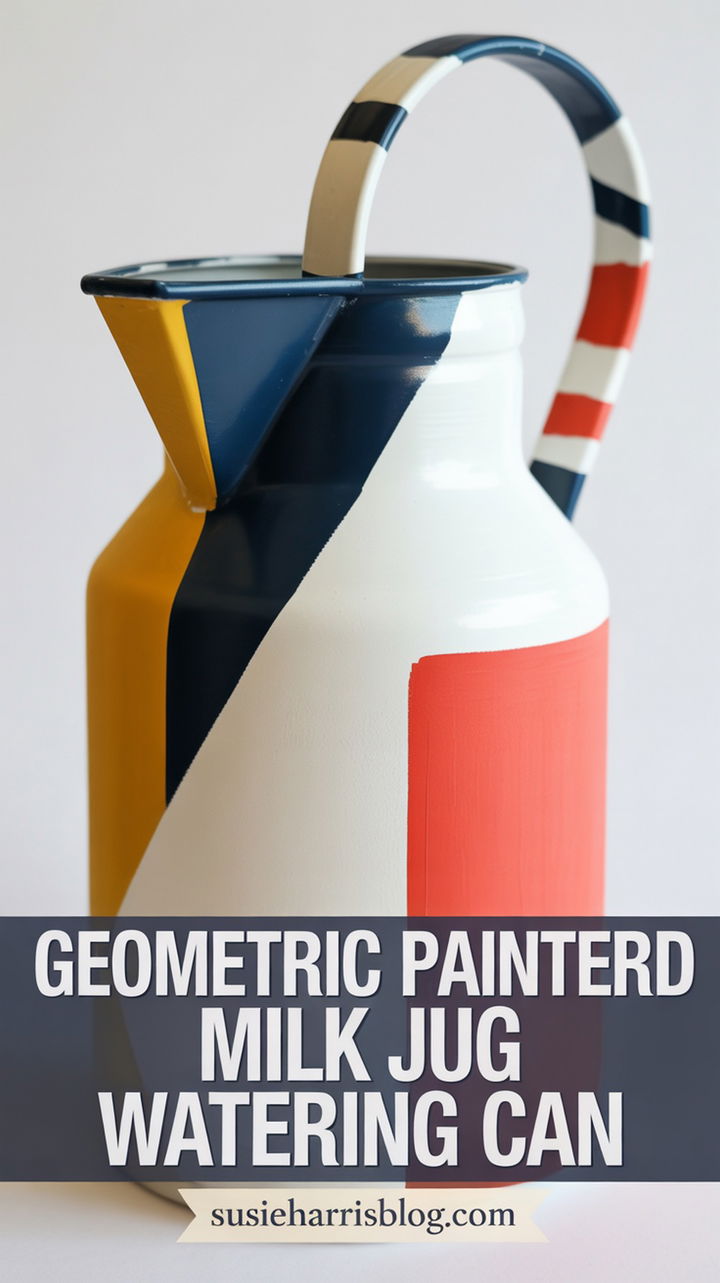
Craft a contemporary accent with this Geometric Painted Milk Jug Watering Can tutorial. After priming the jug, use painter’s tape to mask off triangles, hexagons, or chevrons in an abstract arrangement. Fill shapes with bold acrylic paints—navy, mustard, coral—for a striking contrast against a white base. Peel tape once paint is dry to reveal crisp edges. Seal with matte varnish. For a finishing touch, wrap the handle in metallic washi tape for a modern gleam. This DIY project adds architectural interest to any garden, perfect for those who love clean lines and vibrant geometry in their outdoor décor.
Supplies
• Plastic milk jug (primed)
• Painter’s tape
• Acrylic paints in navy, mustard, coral
• Fine paintbrushes
• Matte clear varnish
• Metallic washi tape
13. Rope Handle Milk Jug Watering Can

Upgrade your watering can with a Rope Handle Milk Jug Watering Can design. Replace the original plastic handle by drilling small holes on each side of the jug’s neck. Thread a thick nautical rope through and knot securely inside. Coat the jug in a protective marine-grade paint—blue, white, or classic navy—for a coastal vibe. Add a cast iron anchor charm or sailor’s knot keychain for thematic flair. This sailor‑inspired watering can blends functionality with maritime style, perfect for beach houses, patios, or garden nooks. Its sturdy rope handle offers comfort and durability, while the painted finish resists sun and moisture.
Supplies
• Plastic milk jug (cleaned)
• Thick nautical rope
• Drill with small drill bit
• Marine‑grade exterior paint
• Cast iron anchor charm or sailor’s knot keychain
• Sandpaper
14. Vintage Lace Trim Milk Jug Watering Can
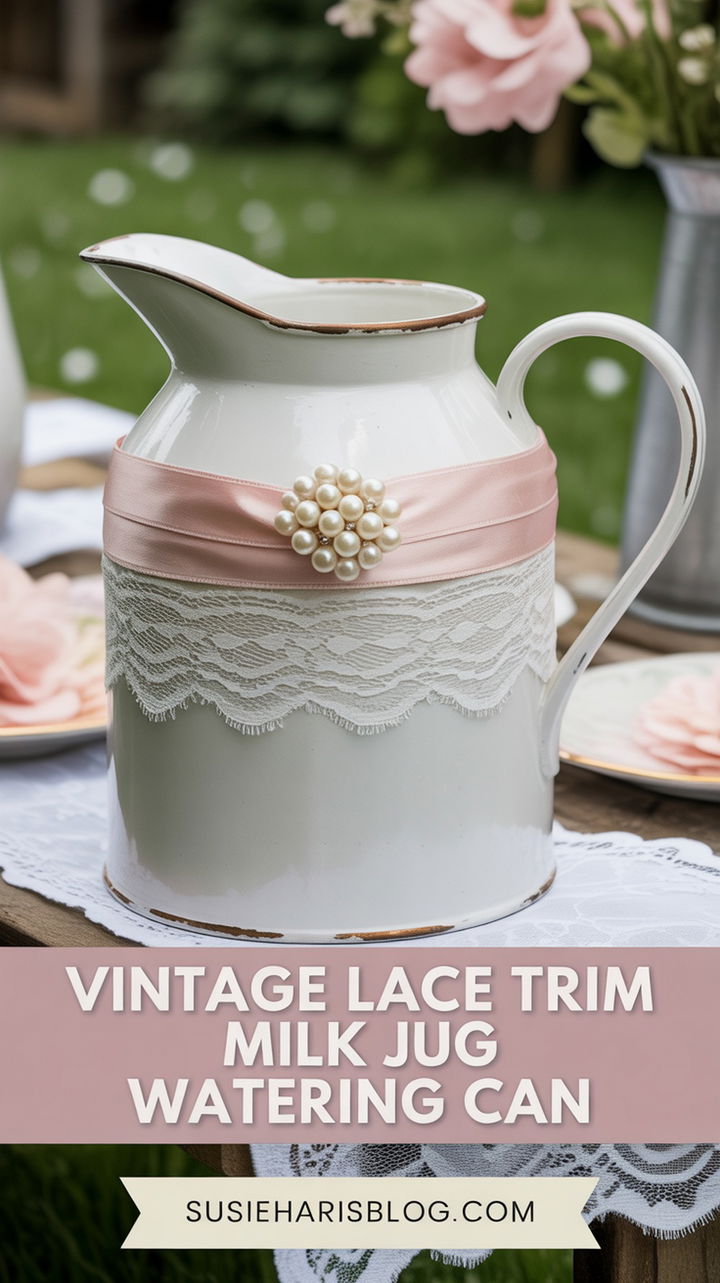
Channel romantic elegance with this Vintage Lace Trim Milk Jug Watering Can. After painting your jug in a soft pastel or antique white, measure and glue a strip of delicate lace around its widest point using fabric adhesive. Layer a second lace ribbon above the first for added dimension. Embellish with a small cameo brooch or pearl cluster at the front center. Seal the lace edge with a thin line of clear-drying glue to prevent fraying. This watering can evokes vintage allure, perfect for cottage gardens, bridal showers, or shabby‑chic interiors. Its lace decoration is durable for light outdoor use and can be refreshed easily by replacing the ribbon.
Supplies
• Plastic milk jug (painted antique white or pastel)
• Delicate lace ribbon
• Fabric adhesive
• Pearl cluster or cameo brooch
• Clear‑drying craft glue
• Small paintbrush for adhesive
15. Color Block Milk Jug Watering Can

Make a bold statement with a Color Block Milk Jug Watering Can. Clean and prime the jug, then use wide painter’s tape to divide it into large geometric sections. Choose three contrasting colors—turquoise, coral, and mustard—and fill each block with two coats of exterior acrylic paint. Remove tape carefully to reveal sharp boundaries. For added polish, paint the handle in one of the chosen accent colors. This modern DIY watering can adds a pop of color to decks, balconies, or flower beds. It’s an eye‑catching project that’s easy enough for beginners yet stylish enough for design enthusiasts seeking playful outdoor décor.
Supplies
• Plastic milk jug (primed)
• Wide painter’s tape
• Exterior acrylic paints in turquoise, coral, mustard
• Paintbrush or foam roller
• Drop cloth or newspaper
• Sandpaper (fine grit)