10 DIY Recycled Tin Cans
Recycled tin cans offer endless possibilities for creative, eco-friendly DIY projects that are both functional and fun. From charming lanterns to playful robots, these humble containers can be transformed into a variety of useful items with just a few tools and a splash of imagination. Start with tin can lanterns—simply punch decorative patterns into the surface, paint them, and add tealights to create glowing accents for your patio or garden. For organization, desk organizers and kitchen utensil holders made from wrapped or painted cans keep your space tidy and stylish. Mini planters are perfect for herbs and succulents, adding greenery to windowsills or balconies. If you’re short on space, mount cans to boards for vertical hanging storage in craft rooms or garages.
Outdoors, bird feeders made from horizontal cans with wooden perches invite feathered visitors, while wind chimes constructed from cans and beads bring music to your backyard. Hosting a gathering? Use a cutlery caddy made from grouped cans on a wooden base to serve utensils or napkins with flair. Pour wax into cans for rustic candle holders that make excellent gifts. And for a touch of whimsy, create tin can robots with kids—add buttons, wires, and googly eyes for a fun craft session. These projects not only promote recycling but also encourage creativity and personalization. Whether you’re decorating your home, organizing your space, or crafting with family, upcycled tin cans are a brilliant, budget-friendly starting point for sustainable DIY living.
1. Tin Can Lanterns
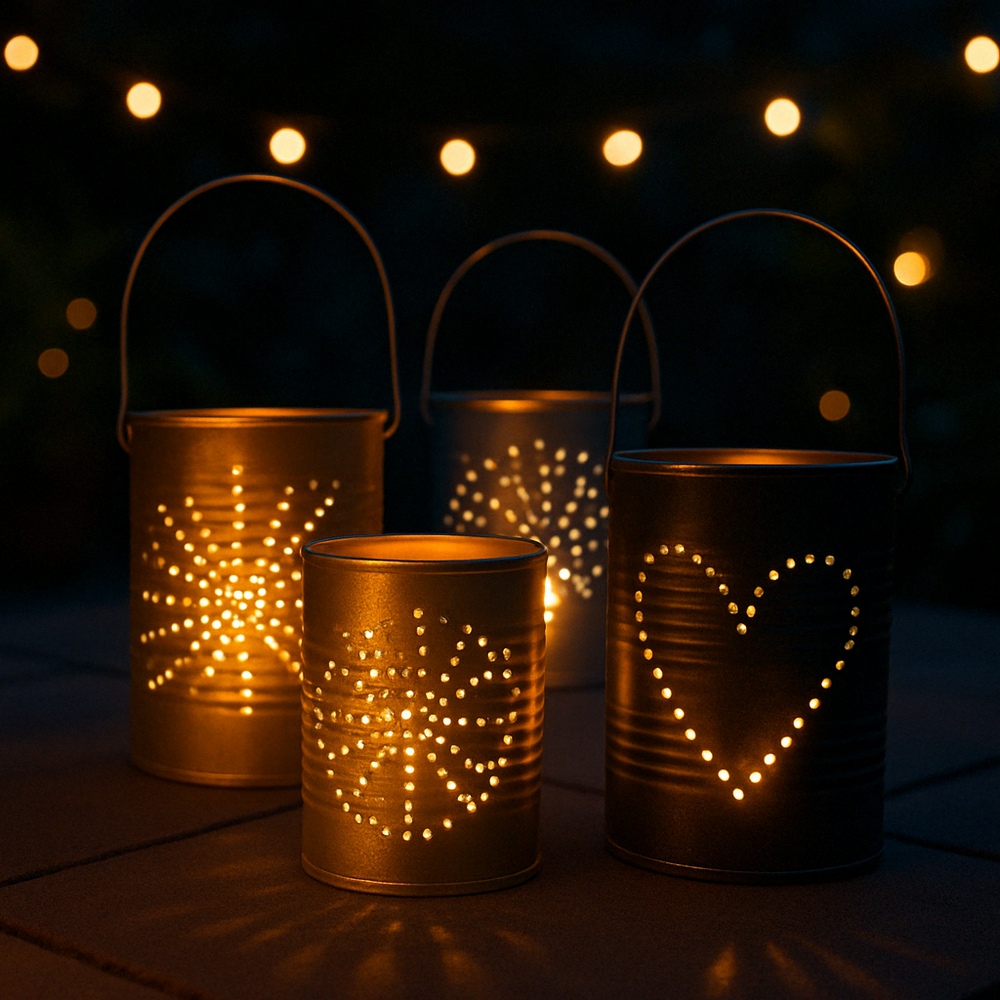
Turn simple tin cans into magical lanterns! Punch creative patterns into clean cans, then paint them in metallic or matte finishes. Add a tealight or LED candle inside, and watch as the light glows through the holes, casting beautiful patterns on your patio or garden walls. These DIY lanterns are perfect for outdoor dinners, evening gatherings, or cozy backyard corners. Hang them from tree branches or line them along walkways for an enchanting and eco-friendly lighting solution.
Supplies
- Empty tin cans
- Hammer and nail or metal punch
- Spray paint (metallic or matte)
- Tealight or LED candles
- Wire or twine for hanging
- Water and freezer (optional for easier punching)
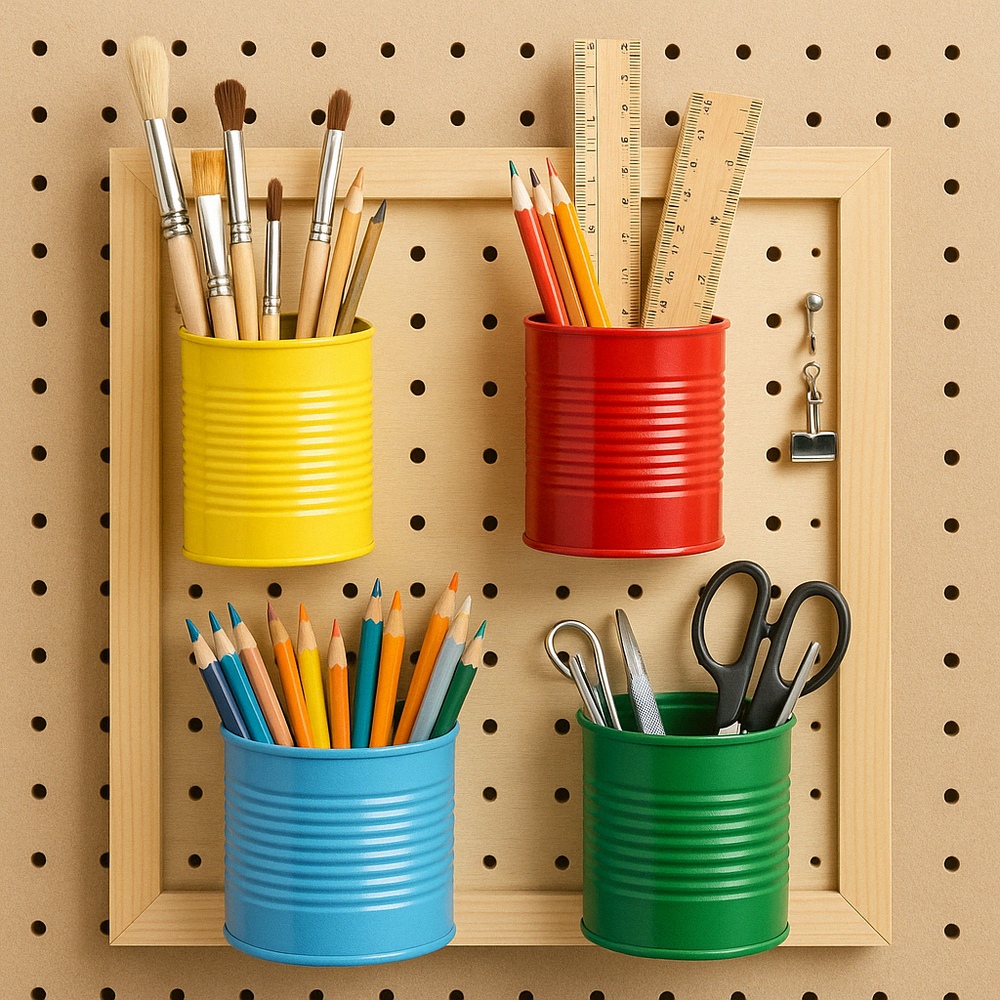
2. Desk Organizers

Declutter your workspace with handmade desk organizers crafted from recycled tin cans. Wrap them in jute twine, patterned fabric, or colorful paper for a custom look. Use them to store pens, brushes, scissors, or crafting tools. Whether you’re organizing your home office or a creative corner, these stylish and sturdy holders add personality and practicality. Group several together in a tray for a coordinated set, or mount them to a wall board for vertical storage. A simple, sustainable upgrade for any workspace!
Supplies
- Clean tin cans
- Jute twine, fabric, or scrapbook paper
- Scissors
- Hot glue gun
- Decorative labels or tags (optional)
3. Mini Planters
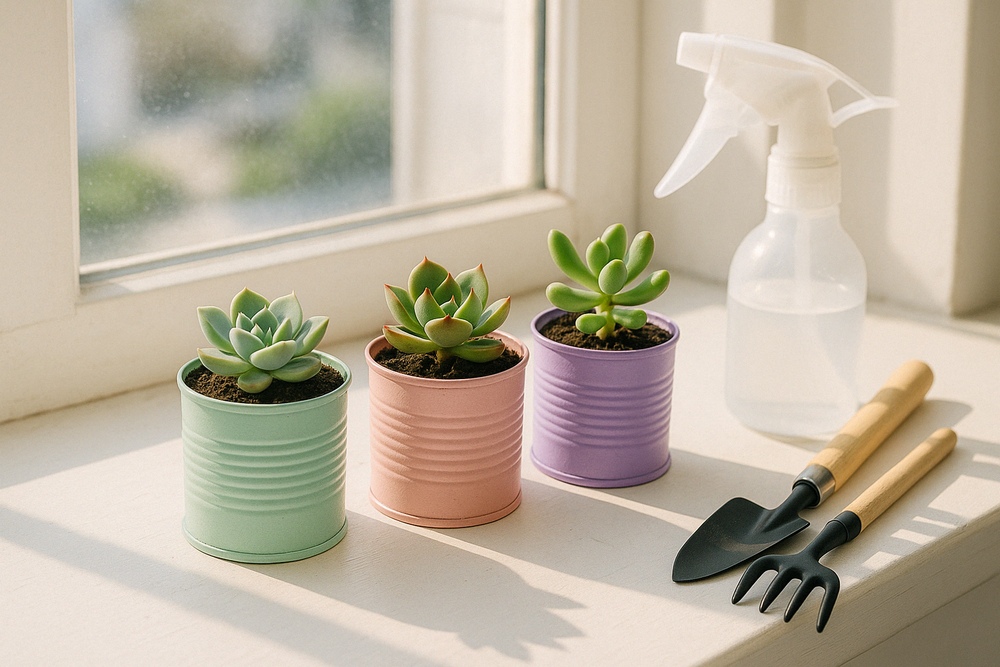
Add a pop of green to your windowsill with mini planters made from tin cans! Paint the cans in cheerful colors or wrap them in twine for a rustic feel. Fill them with soil and plant succulents, herbs, or small flowers. These planters are perfect for small spaces and bring nature indoors with style. Group several together in a tray or hang them in a vertical garden setup. An easy and affordable way to upcycle while growing something beautiful!
Supplies
- Small tin cans
- Acrylic paint or spray paint
- Paintbrushes
- Potting soil
- Succulents or herb plants
- Drill or nail (for drainage holes)
4. Kitchen Utensil Holder
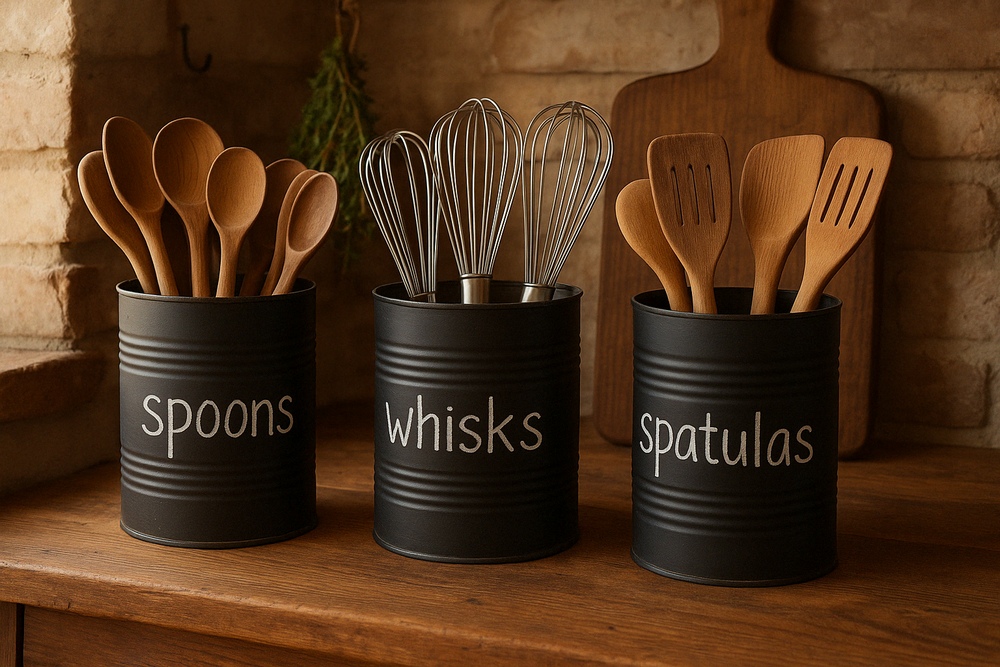
Tame your kitchen clutter with large tin cans turned into charming utensil holders. Clean and paint the cans in chalkboard or neutral tones, then label them for spoons, whisks, or spatulas. Arrange them on a countertop or in a tray for easy access while cooking. For extra charm, wrap them in burlap or add handles. These DIY holders are practical, budget-friendly, and a great way to reuse materials. Perfect for farmhouse kitchens or anyone who loves a homemade touch.
Supplies
- Large tin cans
- Chalkboard paint or neutral paint
- Labels or chalk
- Paintbrushes
- Optional: wood tray or base
5. Hanging Storage
Maximize vertical space with a hanging tin can storage board! Mount clean cans onto a wooden board or pegboard and use them to hold tools, brushes, or office supplies. Paint the cans for a polished look or label them for convenience. Hang the board in your garage, craft room, or workshop to keep essentials within reach. It’s a stylish way to stay organized while reducing waste. This space-saving idea is functional, decorative, and a brilliant use of recycled materials.
Supplies
- Medium-sized tin cans
- Wooden board or pegboard
- Screws or strong adhesive
- Drill
- Paint (optional)
- Labels (optional)
6. Bird Feeders
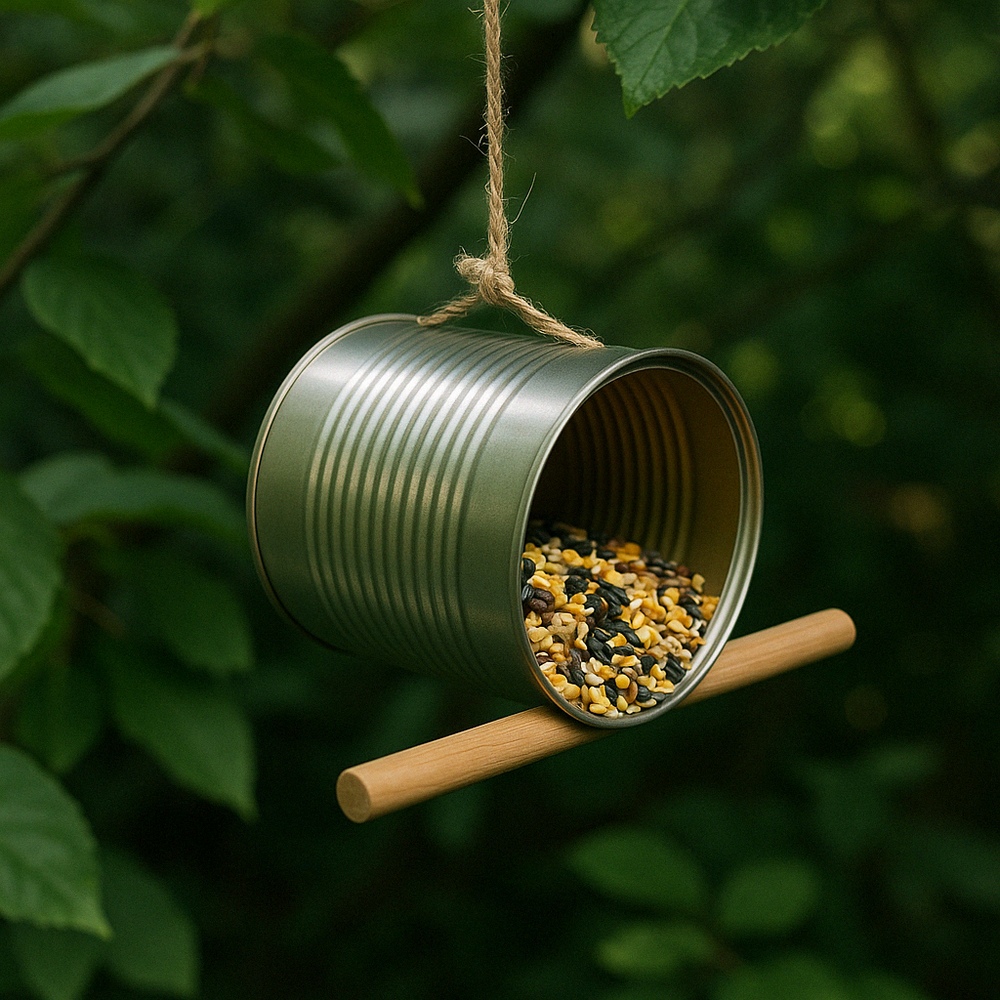
Welcome birds to your garden with a homemade feeder crafted from a tin can. Lay the can horizontally, glue in a wooden dowel as a perch, and fill it with birdseed. Hang it with twine from a tree branch and enjoy watching your feathered visitors stop by. Add a splash of paint for charm or leave it rustic. This eco-friendly project is perfect for nature lovers and a fun craft for kids too. It’s simple, effective, and kind to wildlife.
Supplies
- Clean tin cans
- Wooden dowel or stick (for perch)
- Twine or wire
- Hot glue gun
- Birdseed
- Paint (optional)
7. Cutlery Caddy
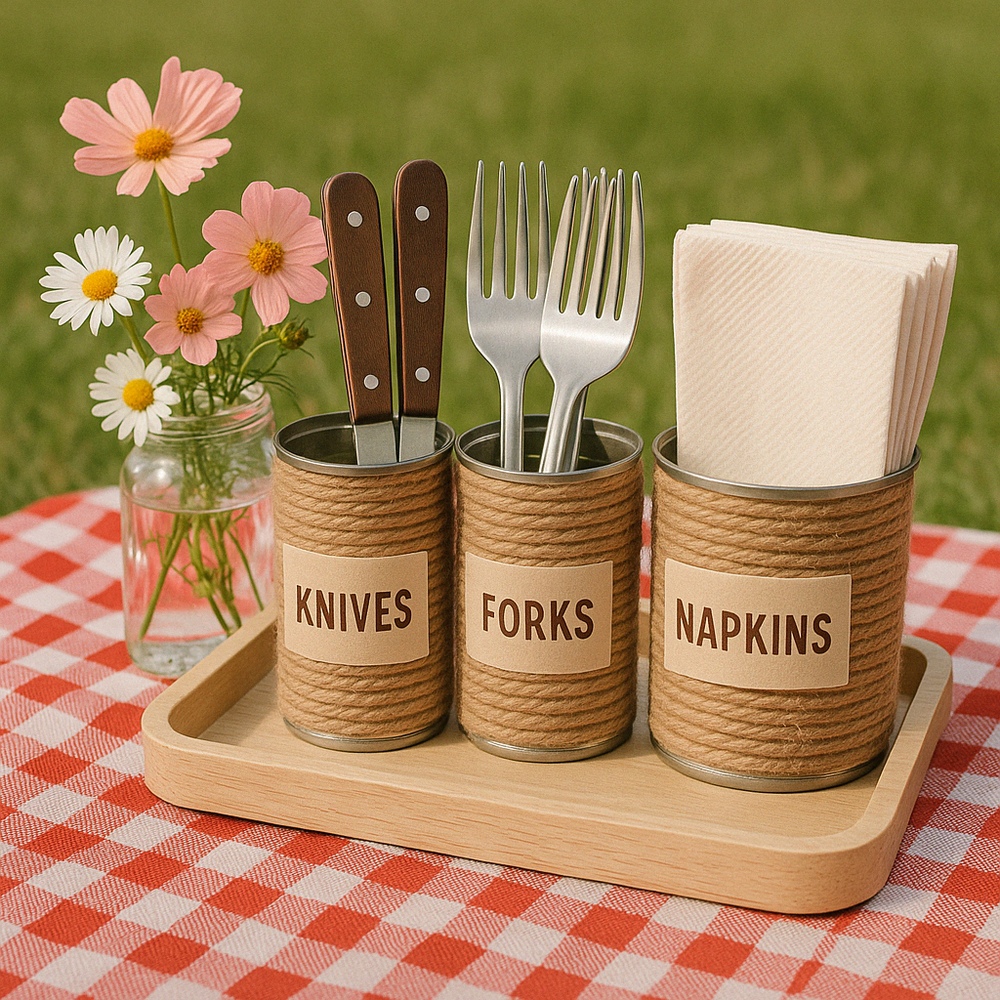
Get picnic-ready with a DIY cutlery caddy made from tin cans! Clean and paint several cans, then attach them to a wooden base or crate. Label each one for forks, spoons, napkins, or condiments. Carry it to outdoor gatherings or set it on a buffet table for organized serving. This project is not only functional but also adds a handmade touch to your hosting. Choose a theme—rustic, colorful, vintage—and make it your own. Reuse, organize, and impress your guests!
Supplies
- 3–5 tin cans
- Wooden board or crate base
- Nails or screws
- Paint or washi tape
- Labels or chalk
- Handle (optional)
8. Candle Holders
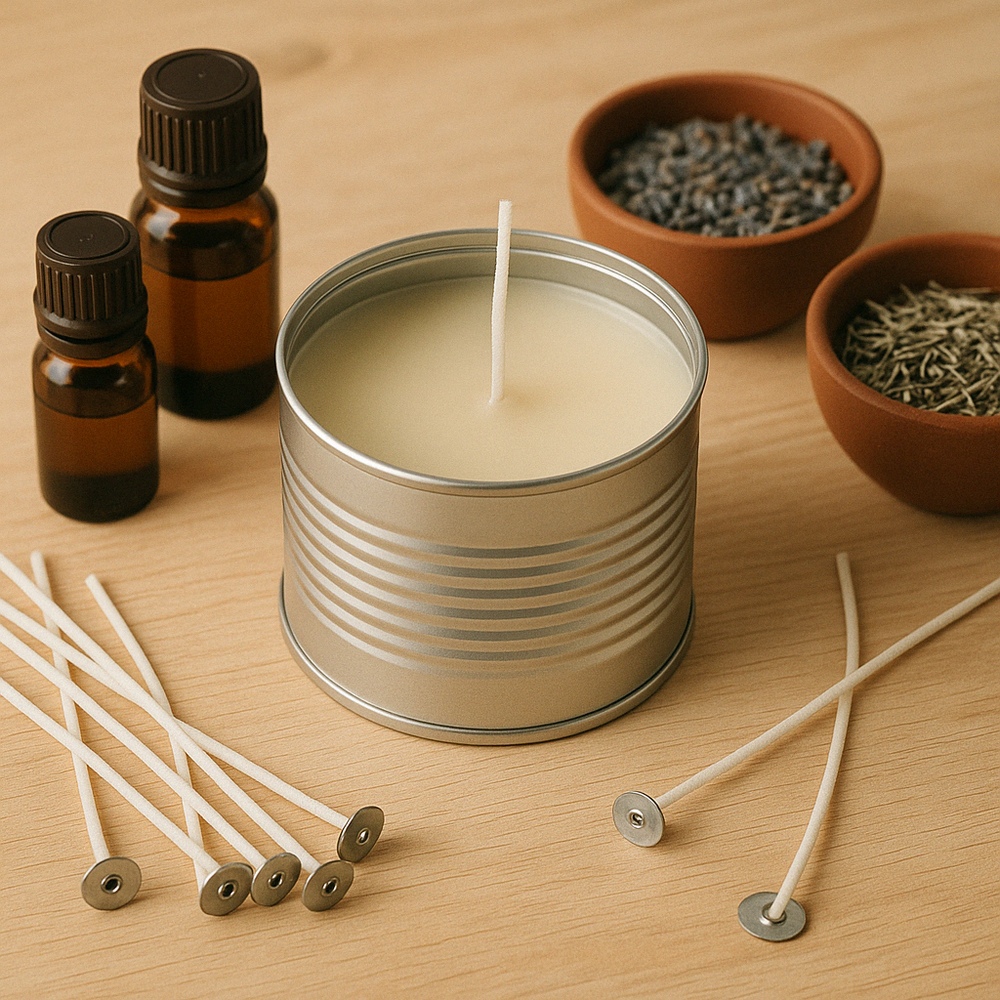
Create rustic charm with tin can candle holders. Pour melted wax into cleaned cans, add a wick, and let it set. You can use essential oils for fragrance and decorate the outside with paint, ribbon, or lace. Perfect for patios, cozy indoor spaces, or as handmade gifts. These candles offer a warm, flickering light and a personal, sustainable touch to your décor. They’re easy to make, budget-friendly, and a lovely way to repurpose household materials into something soothing and beautiful.
Supplies
- Tin cans
- Wax flakes or old candles
- Candle wicks
- Wick holders or pencils
- Essential oils (optional)
- Double boiler or old pot
- Paint or ribbon for decoration
9. Wind Chimes
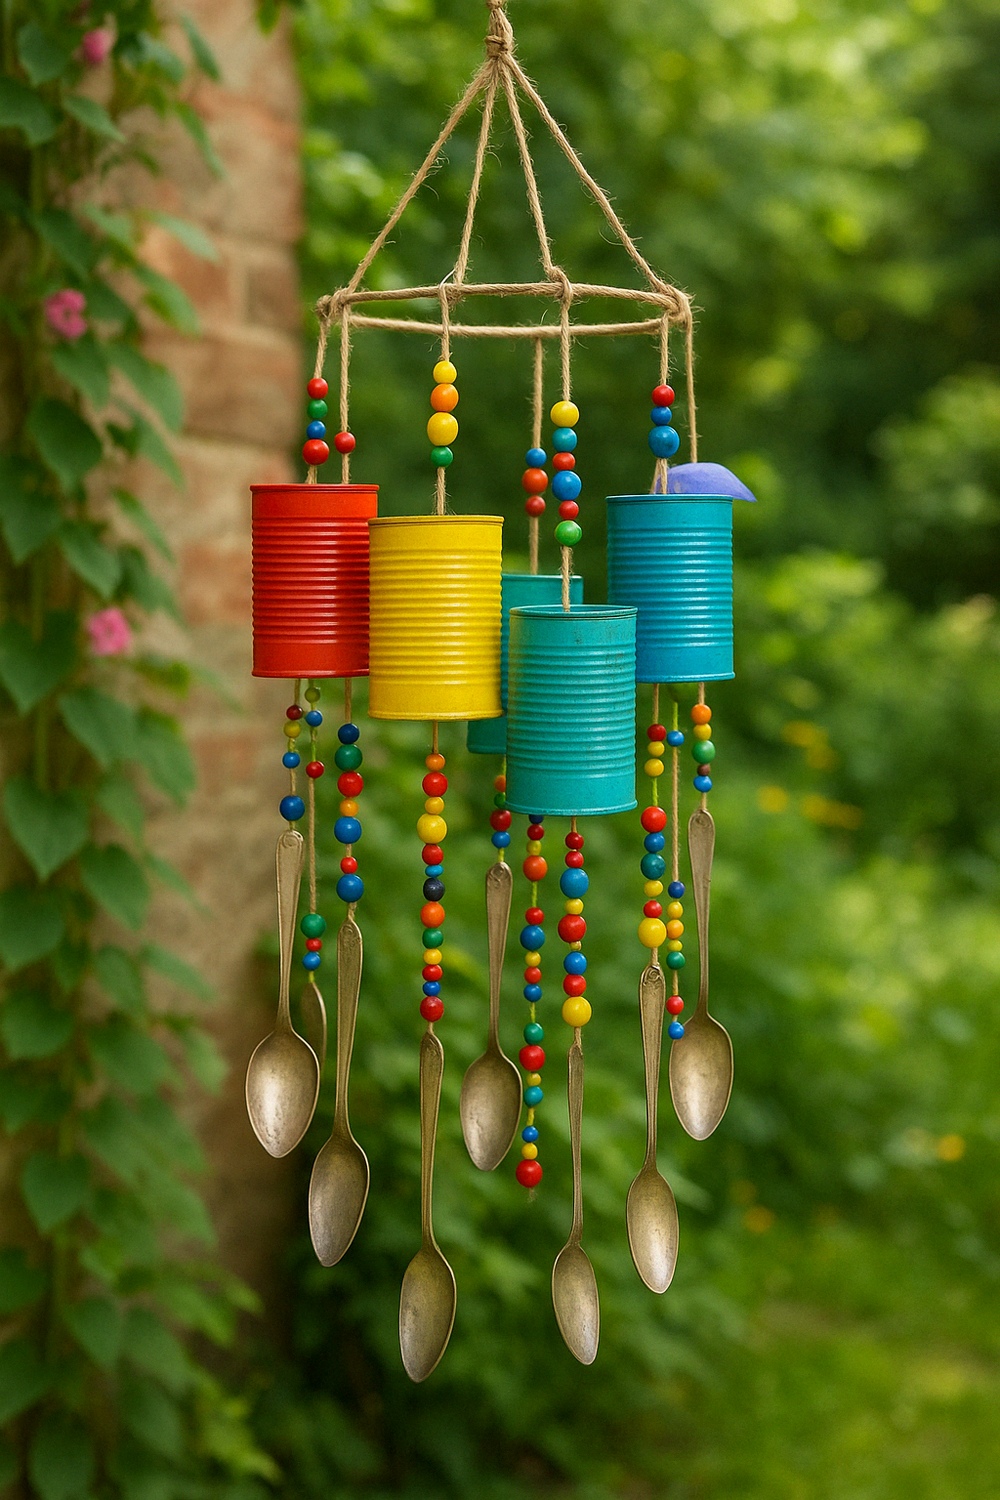
Bring music to your garden with whimsical tin can wind chimes! Stack or dangle cans of different sizes from a frame using string, twine, or chains. Add beads, old keys, or silverware to create beautiful sounds when the wind blows. Paint the cans in bright or pastel colors for visual appeal. Hang your creation from a tree, porch, or fence. This upcycled art project is fun to make, especially with kids, and adds a creative, melodic vibe to any outdoor space.
Supplies
- Tin cans (various sizes)
- String, twine, or fishing line
- Beads, keys, spoons, or charms
- Paint (optional)
- Drill
- Wooden ring or hoop (for top)
10. Tin Can Robots
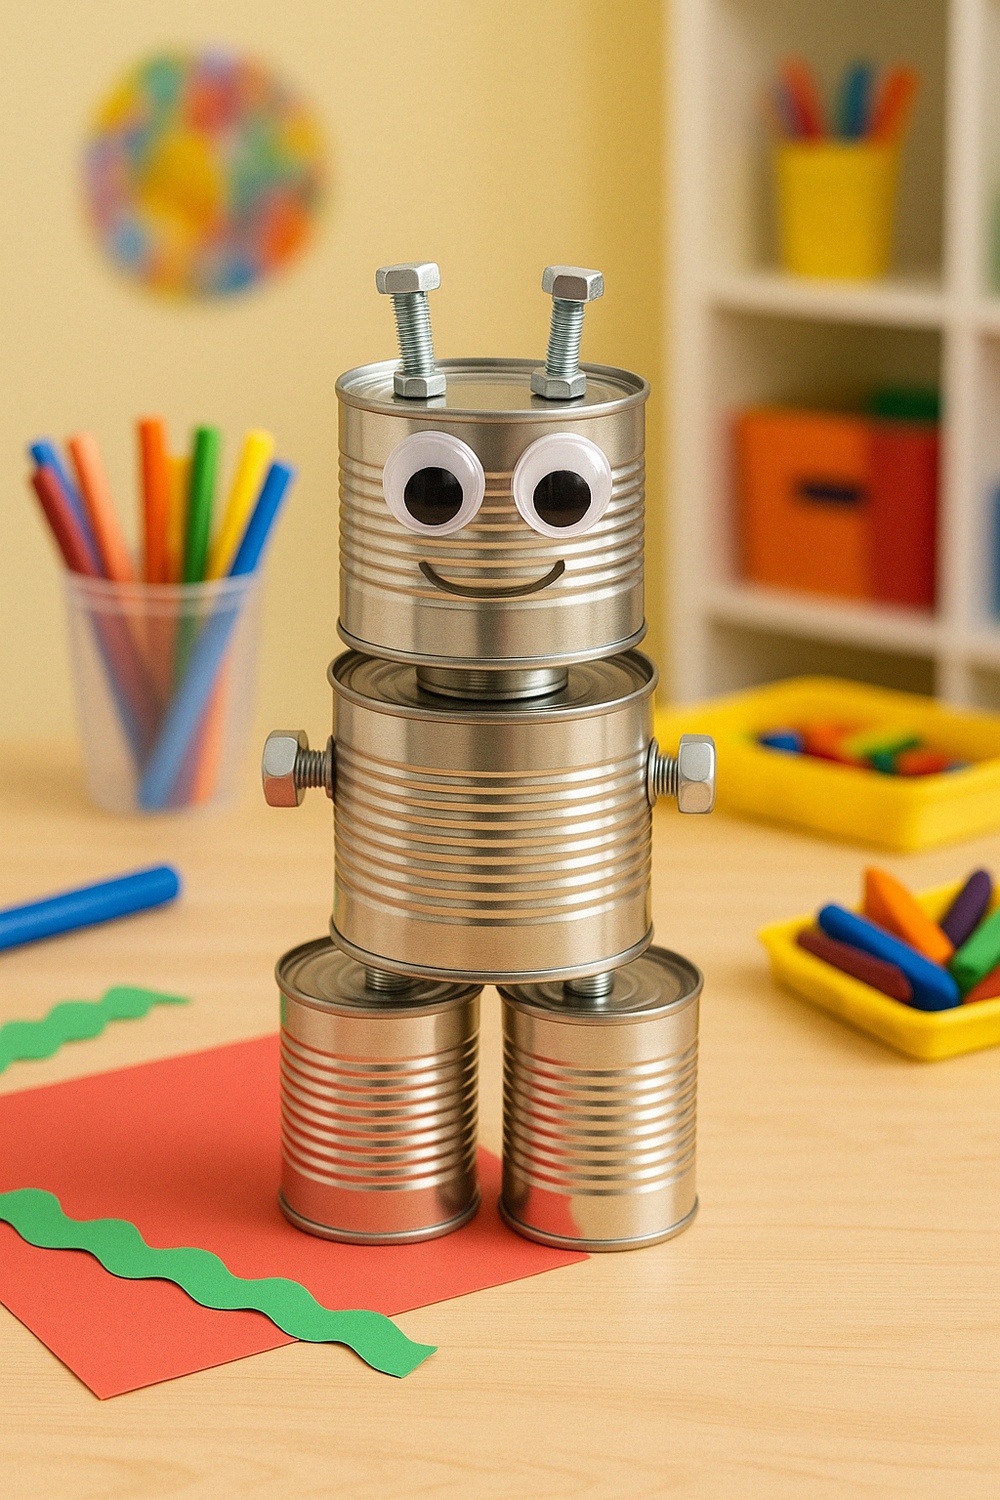
Spark creativity with fun tin can robots! Stack clean cans to form a body, then glue on buttons, screws, bolts, and googly eyes for features. Use wire for arms or antennae, and paint them in bright, cheerful colors. This is a perfect craft for kids, encouraging imagination and fine motor skills. Display your robot on a shelf, or build a whole robot family. It’s a playful way to recycle and a fantastic indoor activity for rainy days or classroom projects.
Supplies
- Tin cans (multiple sizes)
- Googly eyes
- Buttons, nuts, bolts, screws
- Wire (for arms or antennas)
- Hot glue gun
- Acrylic paint and brushes