There are missed opportunities on blank walls. You can make a flat space feel personal, textured, and full of energy with a few smart, low-cost projects that don’t need a contractor. These DIY wall decor ideas are easy to do and give you a big payoff, whether you rent, just moved in, or want a new look before the weekend is over. Think of peel-and-stick decorations that you can take off in a few minutes, smart gallery layouts that tell your story, and crafty art that you’ll be proud to say you made yourself.
There are renter-friendly options, quick paint tricks, and ways to use things you already own in new ways. We’ll put together frames, fabric, mirrors, plants, and textures so that your walls look collected instead of messy. You can expect simple ways to measure, layout ideas you can try out with tape, and hardware options if nails aren’t a possibility. Choose one idea or put a few together to give the whole room a new look.
1. Peel-and-Stick Wallpaper Accent Wall (Zero-Commitment Wow)
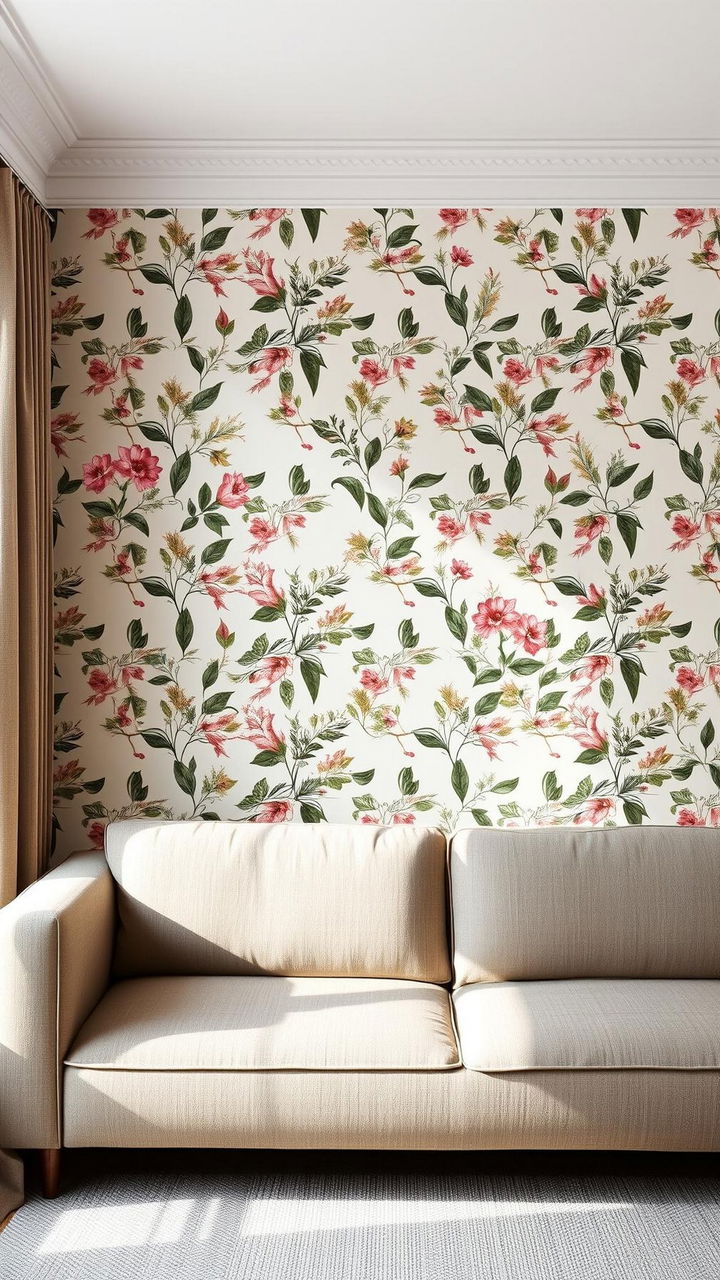
Peel-and-stick wallpaper or big decals can give one wall a lot of character right away. Start with a plumb line to keep the seams straight, then measure your wall and add 10% more for trimming. Start at the top and work your way down, using a plastic scraper to smooth out bubbles. If you need to, lift and reset. For small rooms, pick small patterns. For bigger rooms, pick bold botanicals or stripes. Cut relief slits into plates and trims to wrap them, and then use a sharp blade to finish the edges. For renters, use a hairdryer on low heat to slowly pull off the tape. If a full wall is too a lot, put panels behind a bed, sofa, or desk to make a focused background.
2. Curated Gallery Wall Grid With Mixed Frames
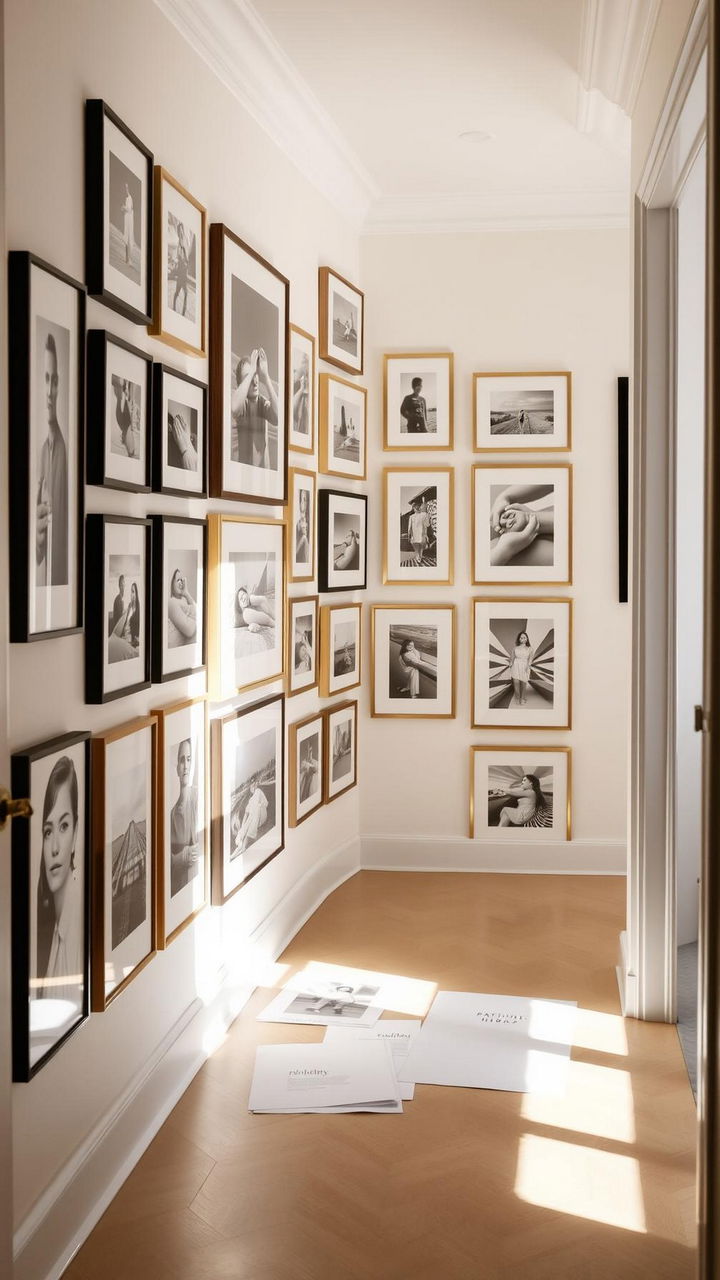
Make a gallery wall that looks planned, not messy. Choose a theme, like travel, family, black and white, or album art, and use the same spacing all the time (2 inches is a good starting point). First, put everything on the floor. Then, draw each frame on paper and tape the templates to the wall so you can easily move them around. If you don’t want to make holes, use picture-hanging strips to hang your frames with plexiglass. To add depth, mix finishes like matte black, wood, and brass. To break up rectangles, add a small mirror or sculpture. Begin in the middle and work your way out. Tip: Keep the bottom row at eye level so you can see it easily.
3. Oversized DIY Canvas Art Using Sample Pots
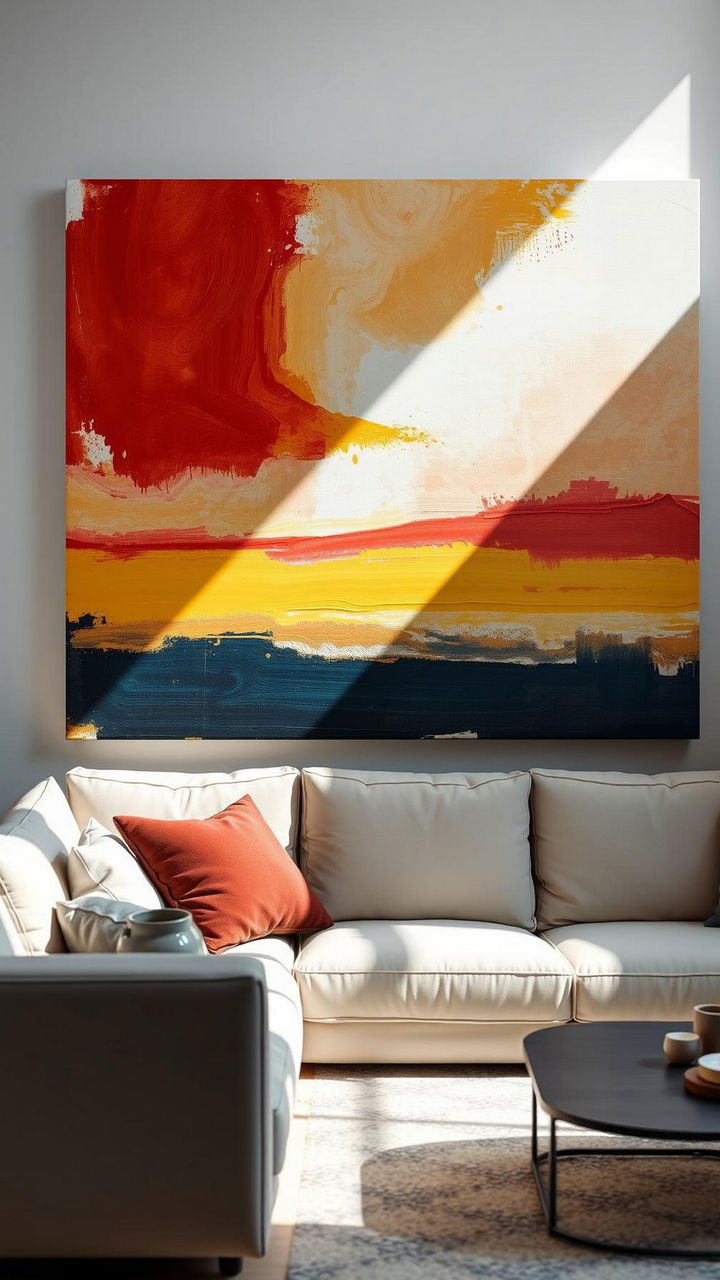
If you want to make big art on a small budget, you can either stretch a drop cloth over a simple frame or buy a cheap blank canvas. Use a pencil to draw big shapes, then fill them in with leftover latex paint or color-matching sample pots. Start with the base fields, then add softer dry-brushed passes to show movement. For balance, use three to five colors in one palette. If the edges look messy, use painter’s tape to cover them and pull them while the paint is still wet to get clean lines. Sign the edge, hang it with two D-rings, and let it float without a frame for a modern look. One statement piece can make a busy room feel calm right away.
4. Fabric Panel Tapestry on a Simple Dowel Rail
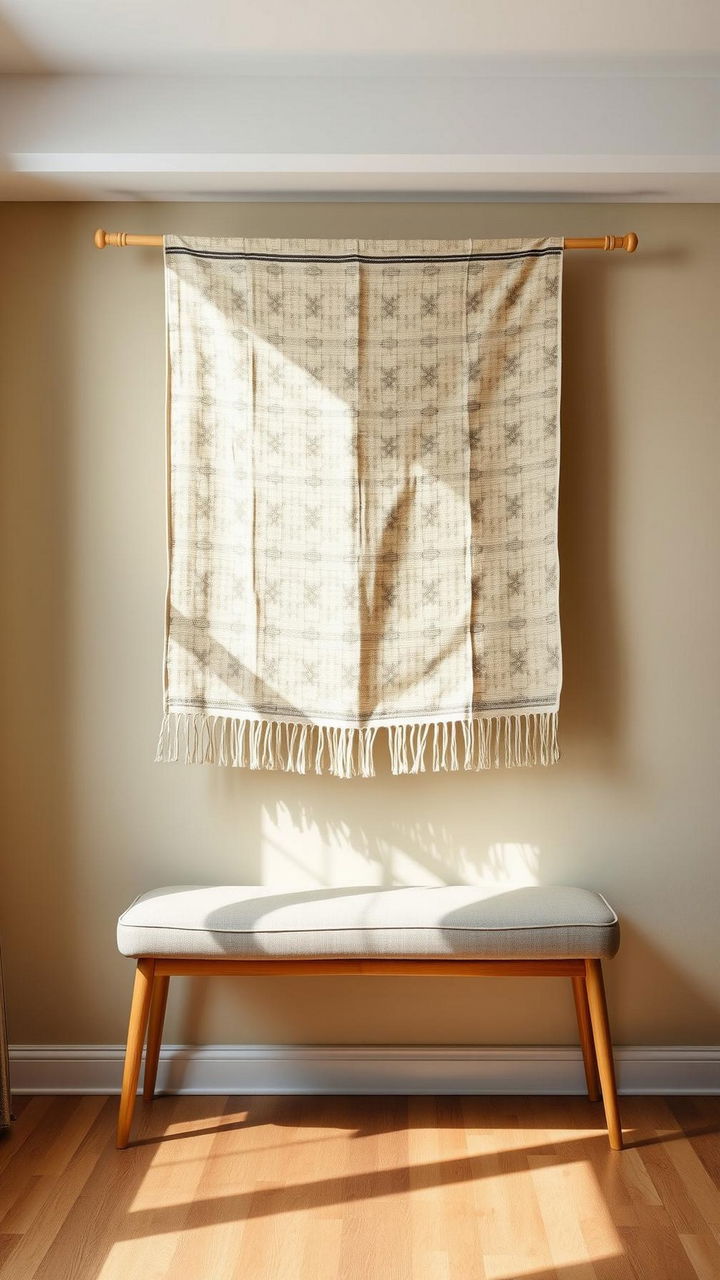
You don’t need a sewing machine to turn pretty fabric into wall art. Choose a vintage scarf, upholstery-weight fabric, or block-printed yardage. Use fusible hem tape to make a clean top pocket, iron it flat, and slide in a wooden dowel. To help it hang straight, add a bottom dowel or clip-on drapery weights. Hang it from leather cords, twine, or a thin curtain rod with ring clips. This trick makes rooms that echo less and adds pattern without making a permanent change. Change out fabrics every season, or frame a piece of wallpaper that you cut off to get a similar look. For renters, use hooks that can be taken off. For permanent hooks, screw small cup hooks into studs.
5. Painted Arch or Color-Block Mural (Fast Architectural Shape)
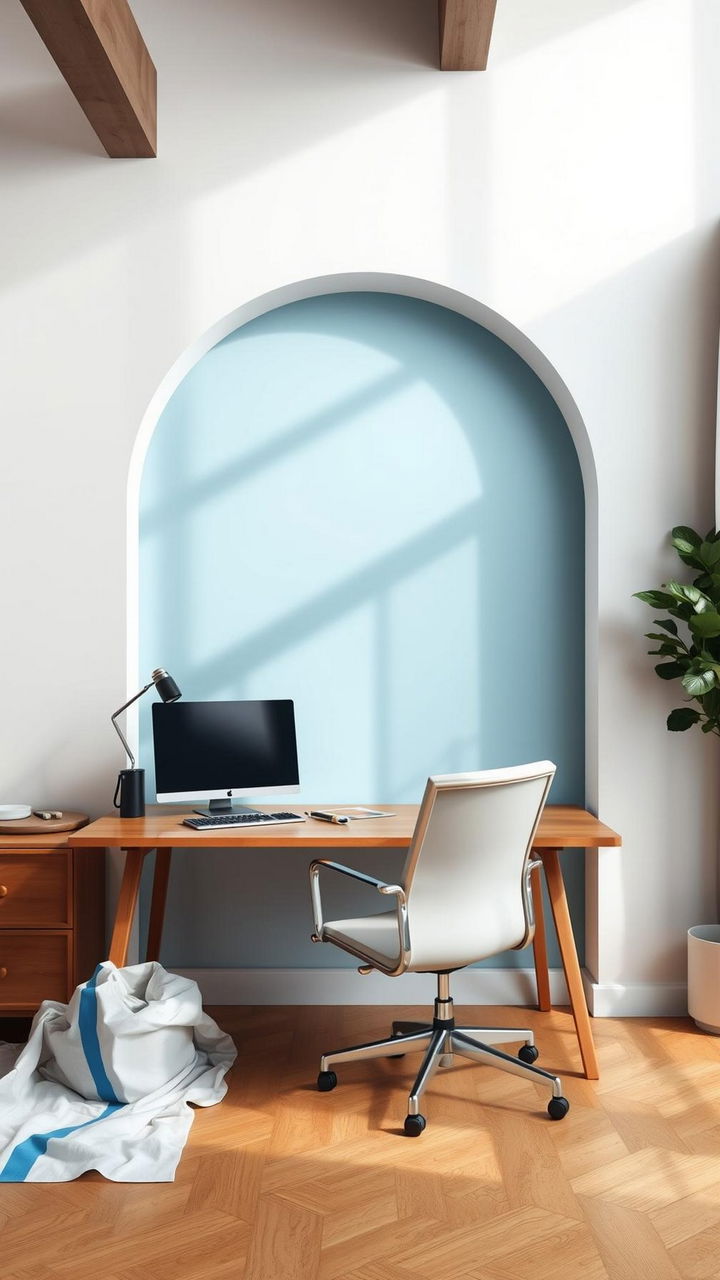
Painted fake buildings. To make an arch, tie a pencil to a string and pin the end of the string at the center point. Then, turn the string to make a perfect curve. Put tape on the verticals, then use a small roller to paint the arch and a sash brush to cut in the edges. For a soft nook effect behind beds, desks, or bar carts, pick a color that is two shades darker than your walls. For a modern look, try stacked rectangles, diagonal blocks, or a dipped wainscot. Take off the tape while the paint is still a little wet to keep ridges from forming. It’s an upgrade that only takes one afternoon and makes a big difference in how things look.
6. Pressed Botanicals and Foraged Nature Frames
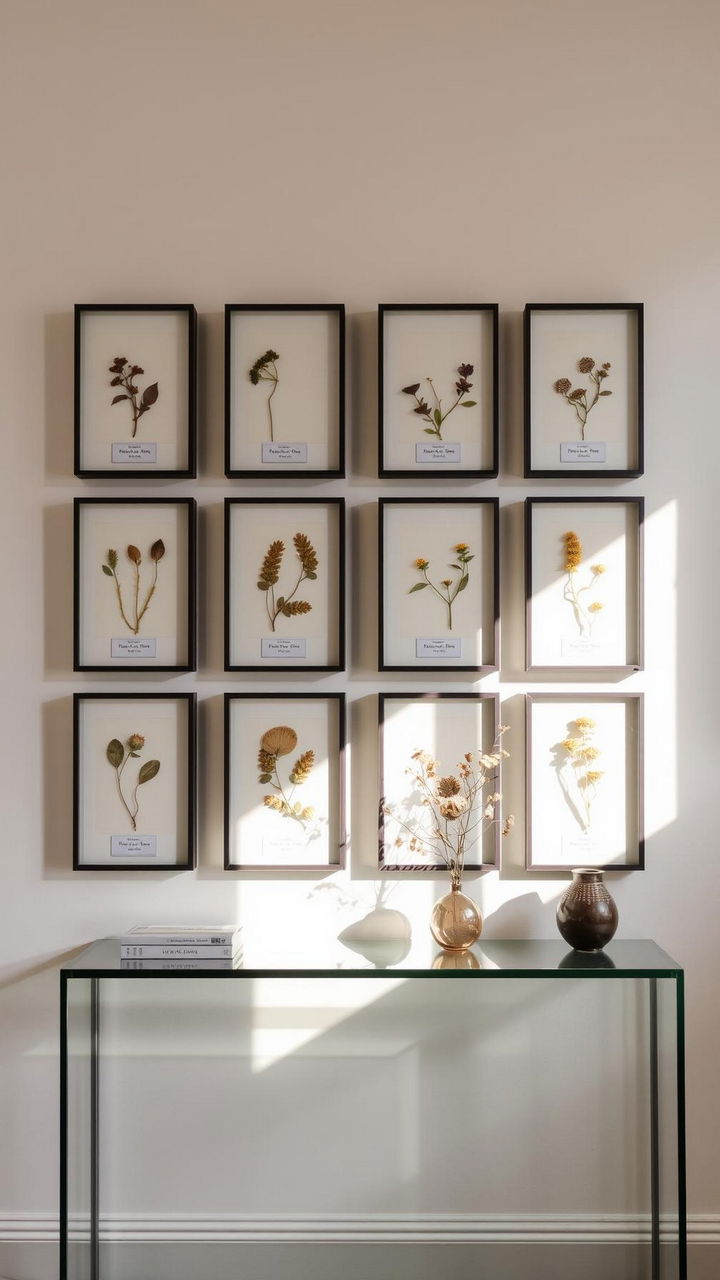
You can bring the outside in by using pressed leaves, wildflowers, or ferns. Press between parchment and heavy books for a week, then glue to off-white cardstock. Grid nine small frames together to make a neat specimen-style display. Float frames make natural edges shine. Mix up the sizes, but make sure the matting is the same so the set looks like one. If you don’t forage, you can use dried stems from the market or snip herbs from the kitchen. For a vintage study look, write small labels on each piece by hand. To keep the plants from fading, keep them out of direct sunlight and use clear mounting corners so they look weightless.
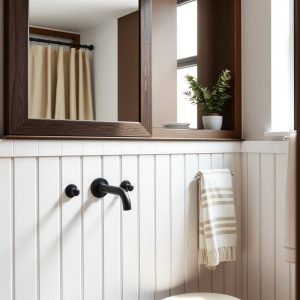
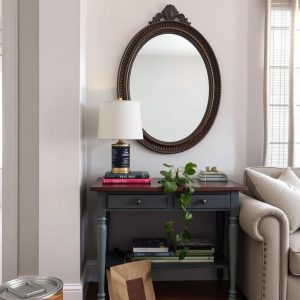
7. Thrifted Mirror Cluster for Light and Sparkle
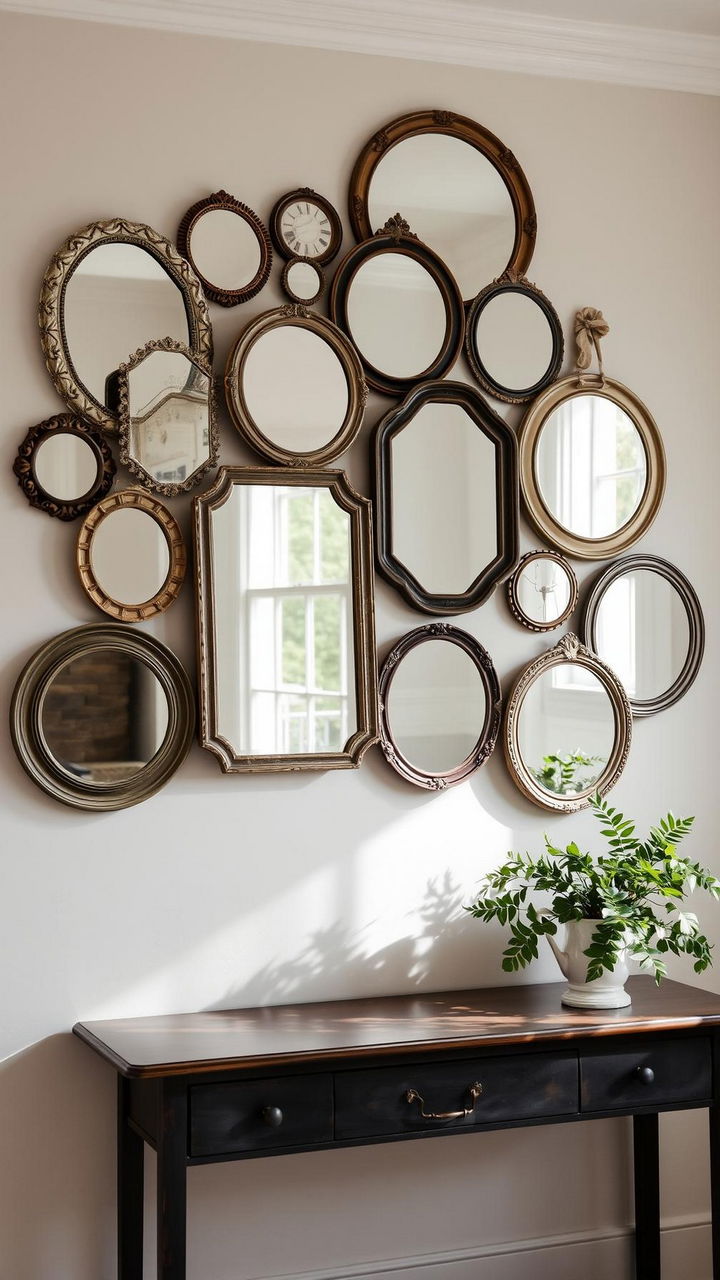
You can find old mirrors at flea markets, thrift stores, or online classifieds. Patina is a good thing. Give all of your mismatched frames a quick coat of the same spray paint, or mix metals for a unique look. Put the biggest pieces first, and then fill in the spaces with smaller shapes like ovals, scallops, and bevels to make it look more rhythmic. Put it in front of a window to let more light into the room. Use heavy-duty picture hangers for mirrors that are heavier. For mirrors that are lighter, strips will work. Safety first: check the backing and add new D-rings if the hardware looks worn out. The uneven reflections make walls look taller and rooms feel brighter right away.
8. Slim Floating Ledge Shelves for Rotating Art
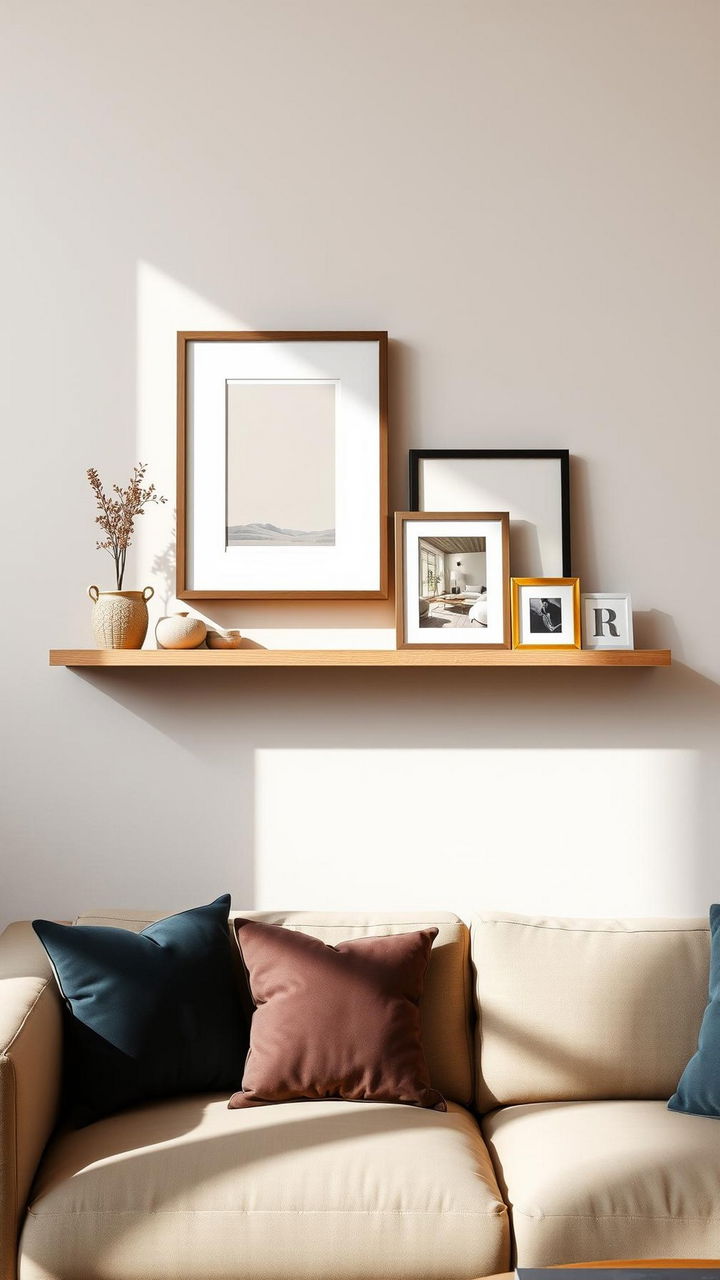
If you like to change art often, make thin ledges so frames can lean. Cut 1×3 and 1×2 pine to the right length, glue and nail them together to make a L with a small lip. Then, sand it smooth and finish it with a clear coat or stain. Put them in studs or use strong anchors. Keep the ledges 6–8 inches apart to make the height look layered. Mix frames, small canvases, and a few objects, like books, candlesticks, and mini vases, to give the space more depth. You won’t have to make holes in the wall every time you change prints because everything is on the shelf. Great for above sofas, headboards, or in hallways.
9. Textured Plaster-Style Art With Joint Compound
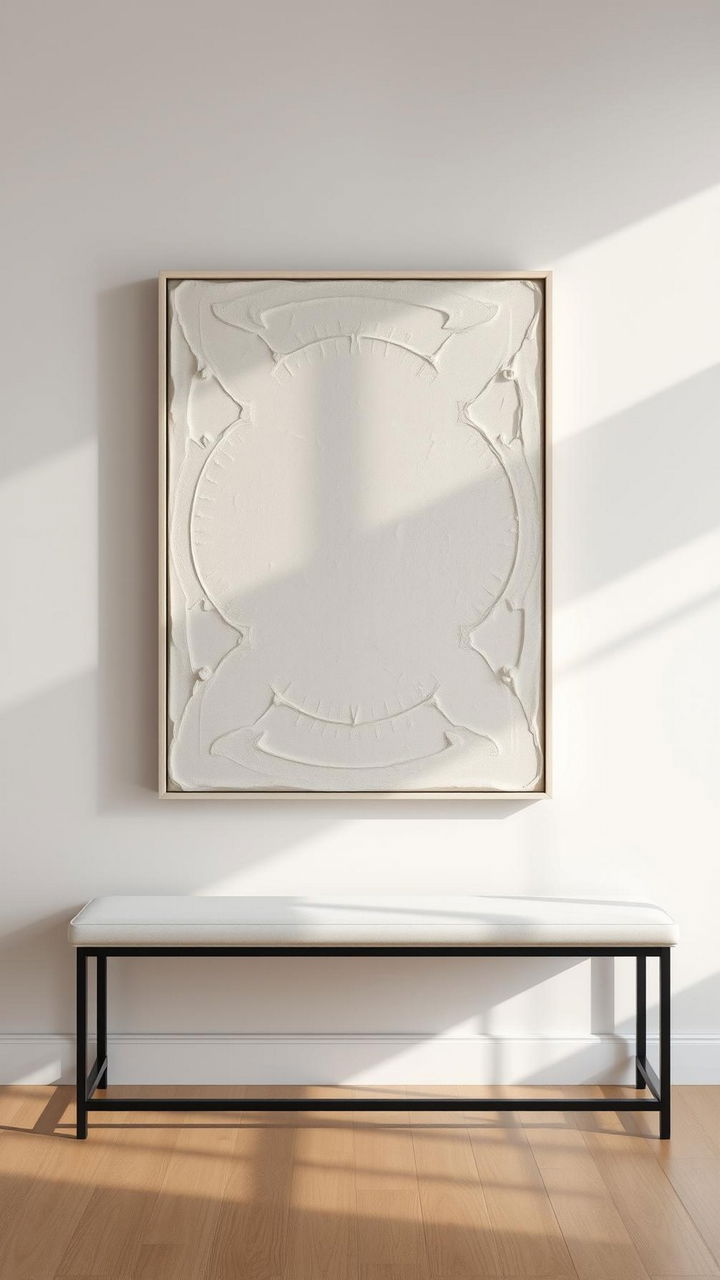
Use joint compound on canvas or primed MDF to make pieces that are gallery-worthy and feel good to the touch. Use a drywall knife to spread thin layers of plaster, and then carve soft waves, Roman clay swirls, or simple ridges. Let it dry completely, lightly sand it, and then seal it with a mineral-wash look or diluted matte paint. Don’t use bright colors like warm white, stone, or mushroom. Let the shadows do the talking. Use a simple float frame or leave the edges raw for a more studio-like look. This project is forgiving: if you don’t like a part, just skim another layer and start over. For a classy, textured look, hang three of them at different heights.
10. Playful Stenciled Dots or Patterned Spot Wall

Pattern without using wallpaper? Try using stencils to make dots, stripes, or scallops. You can make a reusable stencil out of cardstock or buy one online. Start with the first row and work your way out in thin coats to keep the paint from bleeding. A foam pouncer makes clear circles for dots. Change the size to get a new look. To avoid overwhelming the eye, keep patterns to one wall. You could also frame the area behind shelves or a console to make a contained vignette. If you’re afraid of commitment, use removable vinyl dots. You can take them off in a few minutes. Tie the palette to cushions or art so that the pattern doesn’t seem random.
Conclusion
You don’t need expensive tools or a lot of money to make your own wall art. All you need is a plan, some materials, and your own taste. Start with one wall and get more comfortable. When you need to, use renter-friendly hardware, test layouts with tape, and use the same colors throughout to make everything look good. Let your walls tell your story most of all.